Parts of an Excavator Bucket: 7 Components That Matter
Most operators see buckets as simple scoops, but your productivity hinges on matching specific parts of an excavator bucket to your material conditions. Get this right, and you’ll move 30% more material per hour while replacing teeth half as often as your competition.
An excavator bucket includes several key parts: the cutting edge, side cutters, bucket teeth, shell, wear plates, and mounting ears or brackets. The cutting edge and teeth handle digging, while side cutters protect the sides. The shell forms the body, and wear plates add durability.
Anatomy and Functionality of an Excavator Bucket
While seemingly simple, an excavator bucket comprises several key components that work together to ensure optimal performance. Ever wonder why some operators can slice through hard clay like butter while others struggle? It's often about the bucket components. These parts include:
Bucket Teeth
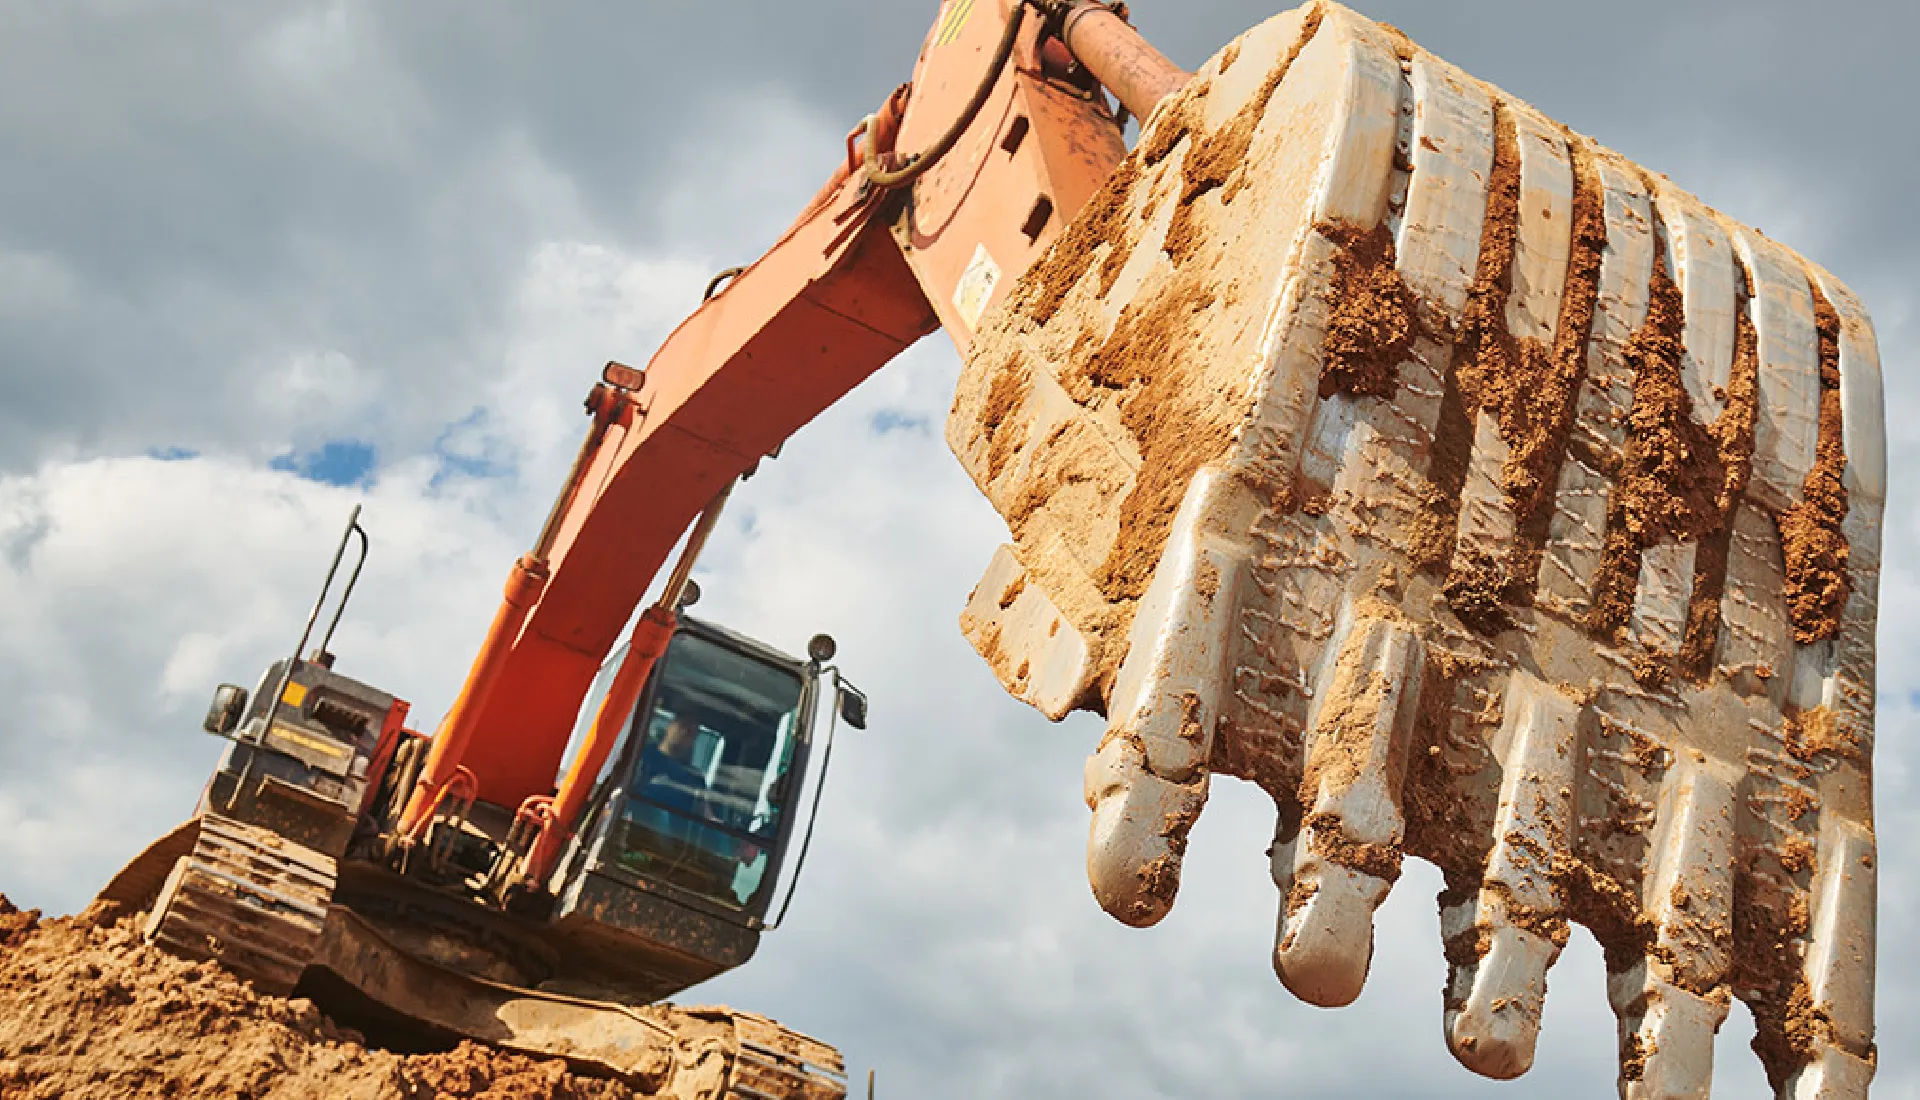
Located on the leading edge of the bucket, these teeth are designed to penetrate and break up hard materials like soil, rock, and concrete. They come in various shapes and sizes, each optimized for specific digging conditions. Sharp and durable teeth ensure efficient digging and reduce strain on the excavator. Think of them as the difference between cutting steak with a sharp knife versus a butter knife.
Cutting Edges
These edges are essential for maintaining the sharpness and effectiveness of the bucket. They act as the primary contact point with the material being excavated, enabling clean cuts and efficient grading. A dull cutting edge can turn a four-hour job into an all-day affair.
Side Cutters
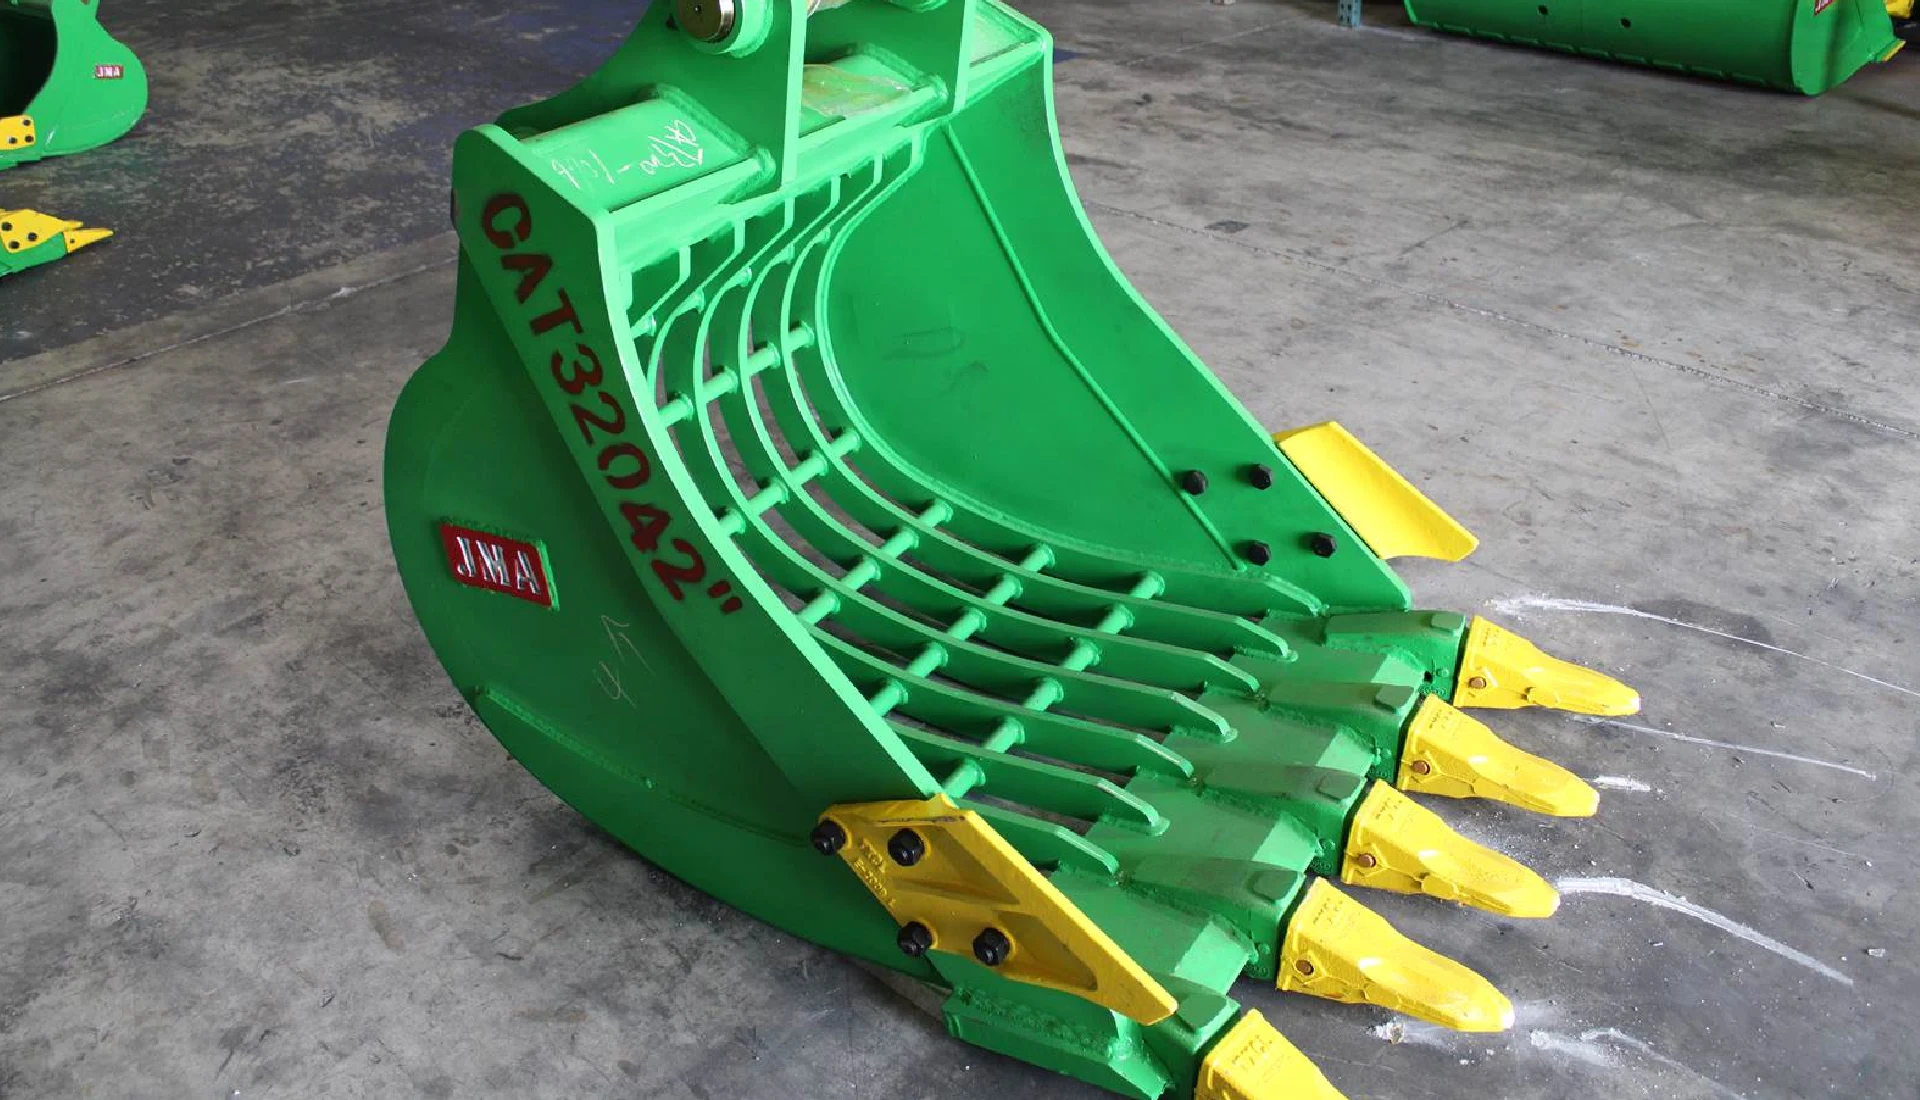
These reinforcements protect the sides of the bucket from damage caused by abrasive materials or impacts during operation. They enhance the bucket's structural integrity and improve its cutting capability, enabling it to tackle roots, rocks, and other obstacles more effectively. Watch an experienced operator use these to slice through root balls and you'll understand their value.
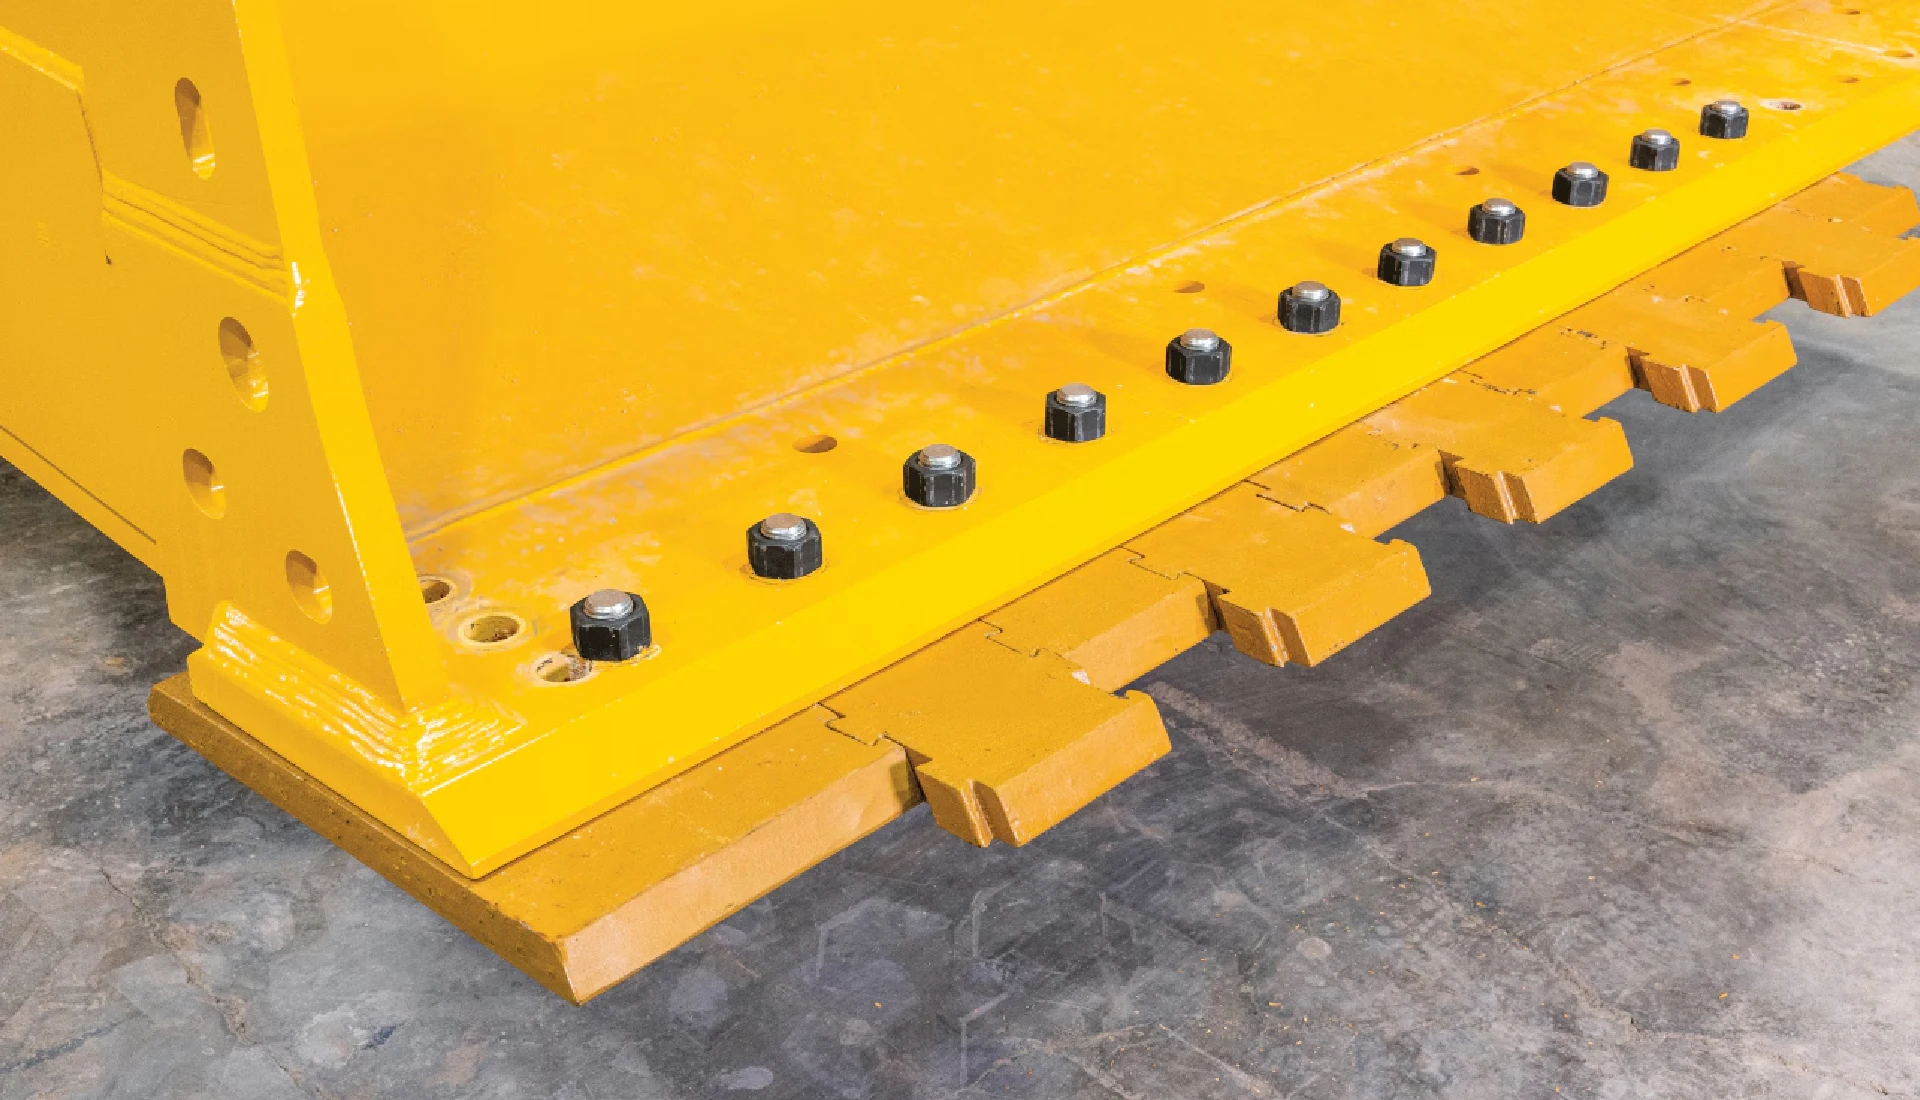
Wear Plates
These plates act as a protective layer, shielding the bucket from excessive wear and tear caused by abrasive materials. They absorb impact and friction, extending the bucket's lifespan and reducing maintenance costs. Skip on wear plates, and you might as well start budgeting for a new bucket sooner than later.
Bucket Shell
This is the main body of the bucket, typically made of high-strength steel alloys to withstand heavy loads and resist wear. It provides the structural integrity of the bucket, holding the other components together and ensuring the excavated material is contained. The difference between economy and premium shells becomes crystal clear after about 500 hours of operation.
Bucket Pins
These connect the bucket to the excavator arm, allowing for articulation and movement. They are usually made of durable steel alloys like AISI 4130 or 4140. These pins enable the operator to control the digging angle and position the bucket accurately. Ever seen a bucket wobbling like it's had too much to drink? Probably worn pins.
Thumb Attachments
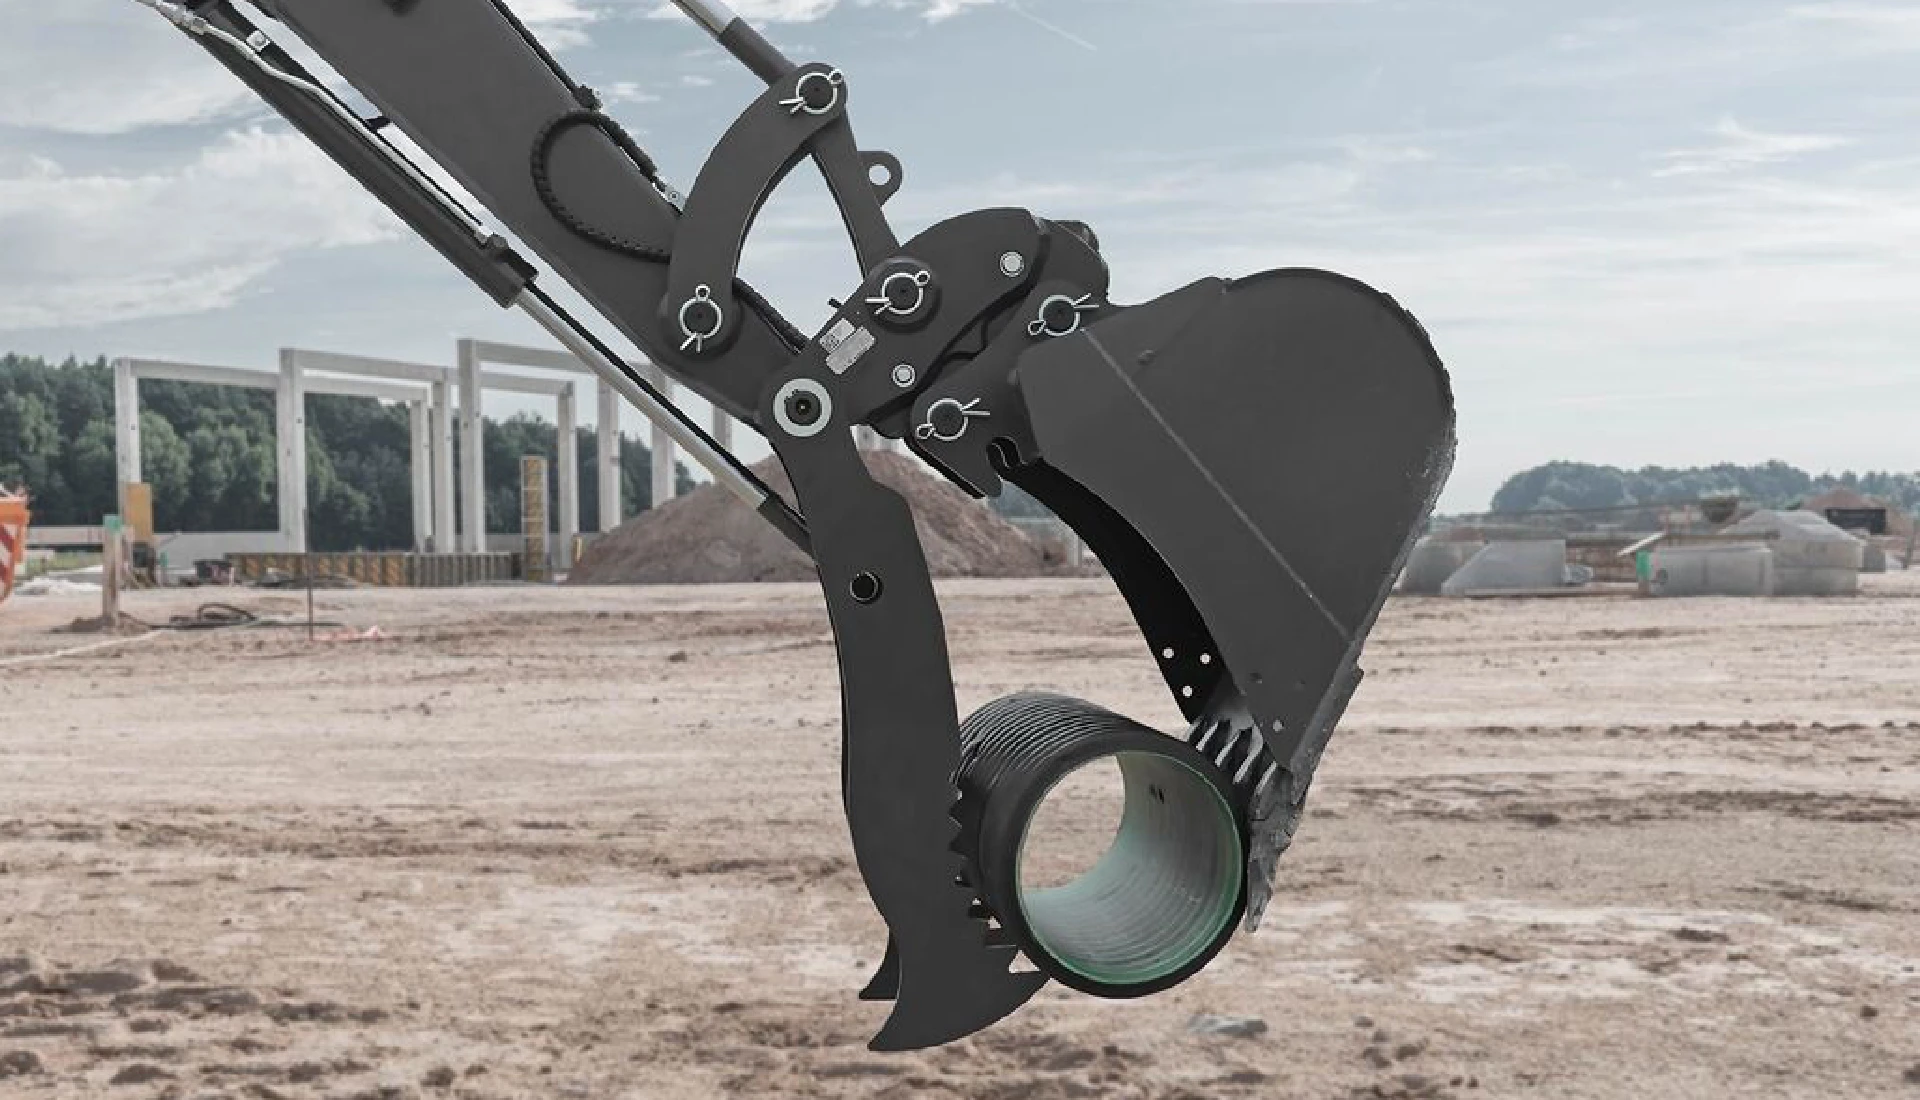
These optional attachments are like an extra "finger" for the excavator, enhancing its ability to grasp and manipulate materials. They are particularly useful for handling irregularly shaped objects, such as rocks or debris. Once you've worked with a thumb attachment, going back to a standard setup feels like trying to pick up marbles while wearing oven mitts.
Materials Used in Excavator Buckets
Excavator buckets are typically constructed from high-strength, wear-resistant materials to withstand the harsh conditions they operate in. Ever wondered why some buckets cost three times more than others? The material composition tells most of the story. Common materials include:
Data based on field performance in mixed-use applications. Higher values indicate better performance.
Steel Alloys: High-strength steel alloys like HARDOX or BISALLOY are frequently used for the bucket shell and other components due to their excellent abrasion resistance and durability. These aren't your grandfather's steel plates - they're engineered specifically for punishment.
AR360 and AR400 Steel: These are medium carbon, low alloy steels that are heat-treated to provide excellent abrasion resistance and high impact strength. AR400 offers superior yield strength compared to AR360. Both are carefully quenched and tempered to achieve the desired properties for excavator buckets.
The difference between AR360 and AR400 isn't just marketing - you'll feel it in the field when you're digging through rocky terrain.
Hardened Steel Inserts: These are often used to reinforce cutting edges and side plates, providing extra protection against wear and tear in high-abrasion environments. Smart operators know that a bucket with good inserts can power through material that would chew up a standard bucket.
Wear Liners: Replaceable wear liners are commonly used to protect the bucket shell from prolonged abrasion, extending its lifespan and reducing maintenance costs. Think of these as the sacrificial anodes in your operation - they take the punishment so your expensive bucket doesn't have to.
Cast Components: Some buckets incorporate cast components in critical areas to enhance durability and structural integrity. There's a reason premium buckets use casting where it counts - it's not just for show.
The specific materials used depend on the intended application and the type of excavator bucket. For instance, heavy-duty buckets used for rock excavation often utilize more robust materials like AR400 steel and hardened steel inserts to withstand the increased wear and tear.
When working with abrasive materials like recycled concrete, the difference in material quality can mean the difference between replacing a bucket every six months or every two years.
Types of Excavator Buckets and Their Applications
Excavator buckets come in various types, each designed for specific tasks and applications. Selecting the right bucket type is crucial for maximizing efficiency, productivity, and cost-effectiveness.
Ever seen someone trying to dig a narrow trench with a grading bucket? It's like watching someone try to eat soup with a fork. Some common types include:
flowchart TD
start[What Material Are You Working With?]
start --> soilGP[Soil & General Purpose]
start --> hardMat[Hard Materials]
start --> utilities[Near Utilities]
start --> finishWork[Finishing Work]
start --> debrisWaste[Debris & Waste]
%% Soil & General Purpose Path
soilGP --> soilType{Soil Type?}
soilType -->|Sandy/Loamy| stdDigging[Standard Digging Bucket]
soilType -->|Clay/Heavy| hDDigging[Heavy-Duty Digging Bucket]
%% Hard Materials Path
hardMat --> hardness{Material Hardness?}
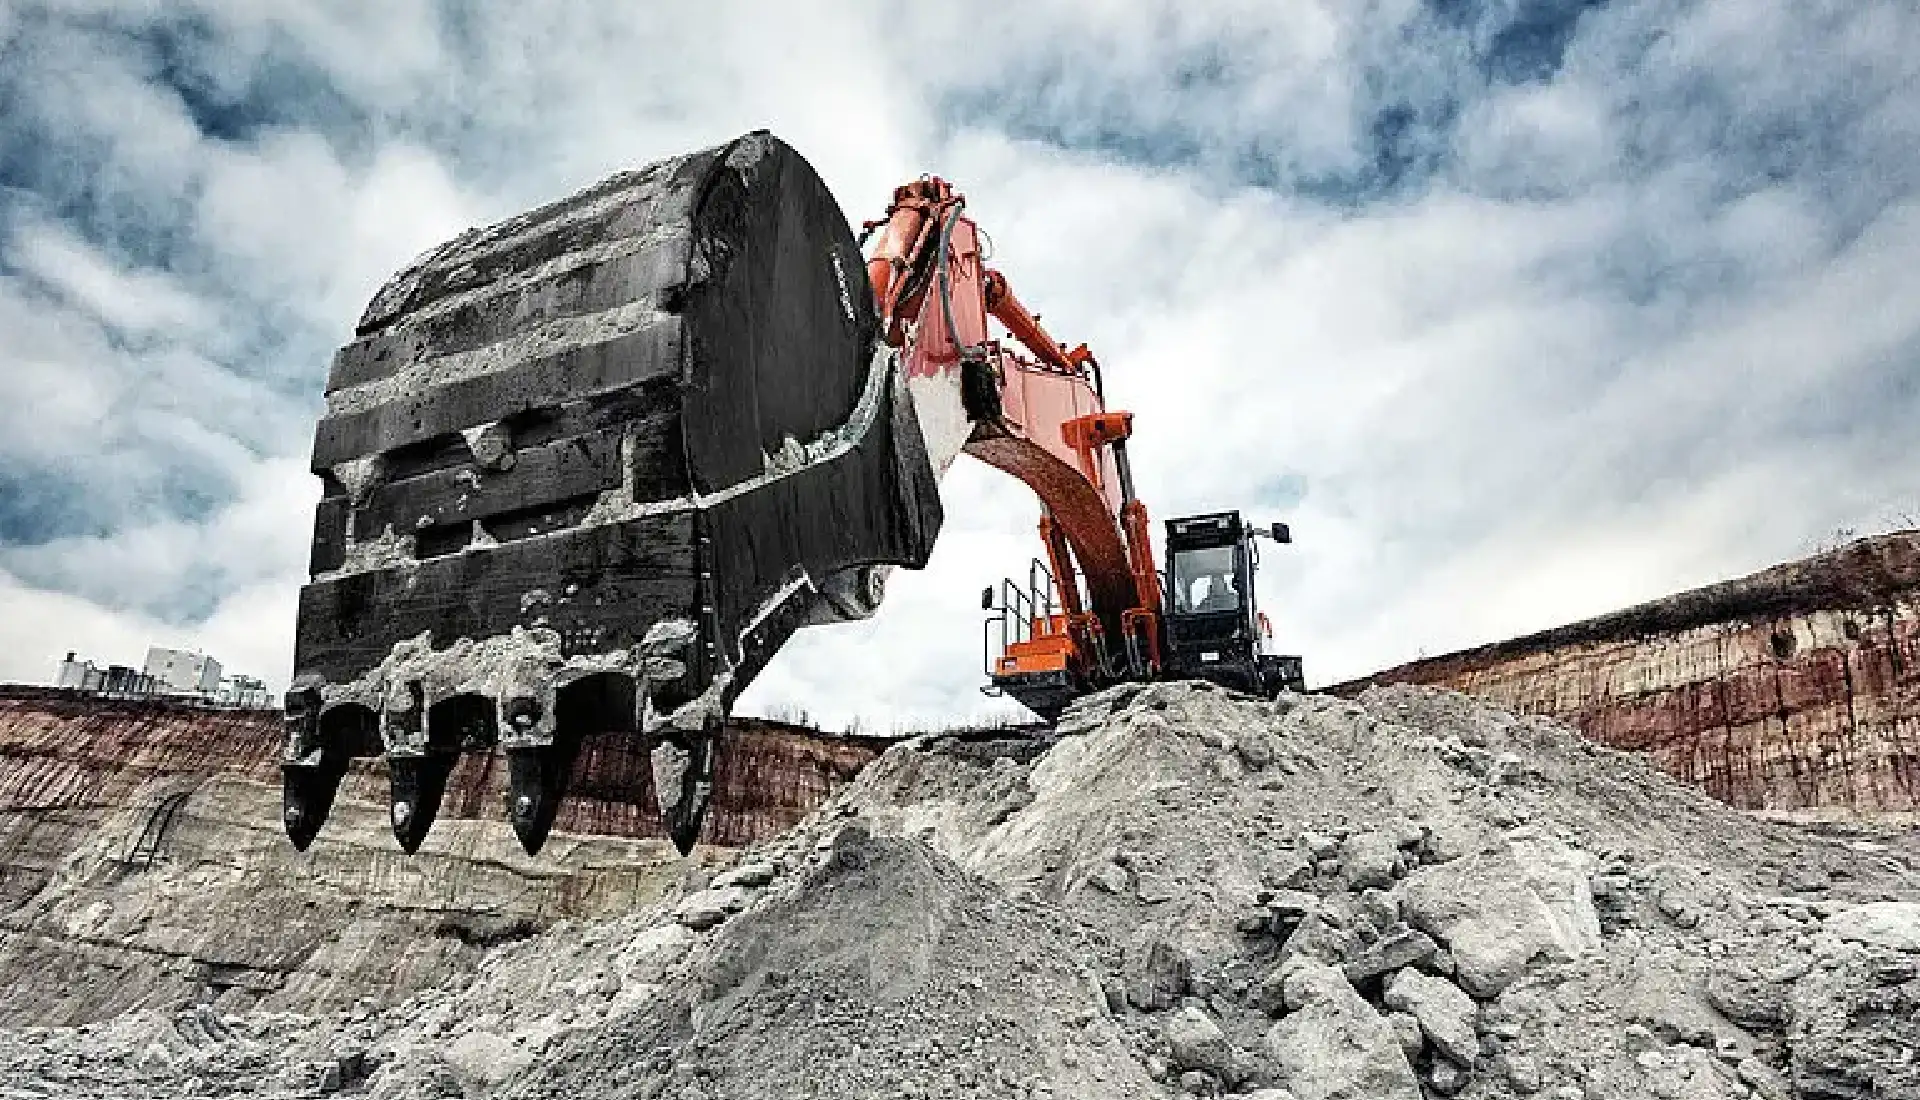
hardness -->|Concrete/Asphalt| hDRock[Heavy-Duty Rock Bucket]
hardness -->|Solid Rock| rBucket[Rock Bucket w/ Extra Reinforcement]
%% Utilities Path
utilities --> utilitiesQ{Risk Level?}
utilitiesQ -->|High Risk| utilBucket[Utility Bucket w/ Rounded Edge]
utilitiesQ -->|Precise Work| thinBucket[Narrow Trenching Bucket]
%% Finishing Work Path
finishWork --> surfaceType{Surface Type?}
surfaceType -->|Flat Areas| gradingB[Grading Bucket]
surfaceType -->|Slopes/Ditches| tiltBucket[Tilt Ditch Cleaning Bucket]
%% Debris & Waste Path
debrisWaste --> materialType{Material Type?}
materialType -->|Mixed Debris| skelBucket[Skeleton/Sorting Bucket]
materialType -->|Irregular Objects| thumbBucket[Bucket with Thumb Attachment]
%% Styling
classDef default fill:#f9f9f9,stroke:#333,stroke-width:1px
classDef question fill:#d1e7dd,stroke:#333,stroke-width:1px
classDef solution fill:#e7f2fa,stroke:#333,stroke-width:1px,color:#333
classDef category fill:#e5d8e3,stroke:#333,stroke-width:1px,font-weight:bold
class start question
class soilType,hardness,utilitiesQ,surfaceType,materialType question
class stdDigging,hDDigging,hDRock,rBucket,utilBucket,thinBucket,gradingB,tiltBucket,skelBucket,thumbBucket solution
class soilGP,hardMat,utilities,finishWork,debrisWaste category
%% Link labels with more info
linkStyle 5,6 stroke:#28a745,stroke-width:1.5px
linkStyle 7,8 stroke:#dc3545,stroke-width:1.5px
linkStyle 9,10 stroke:#fd7e14,stroke-width:1.5px
linkStyle 11,12 stroke:#6f42c1,stroke-width:1.5px
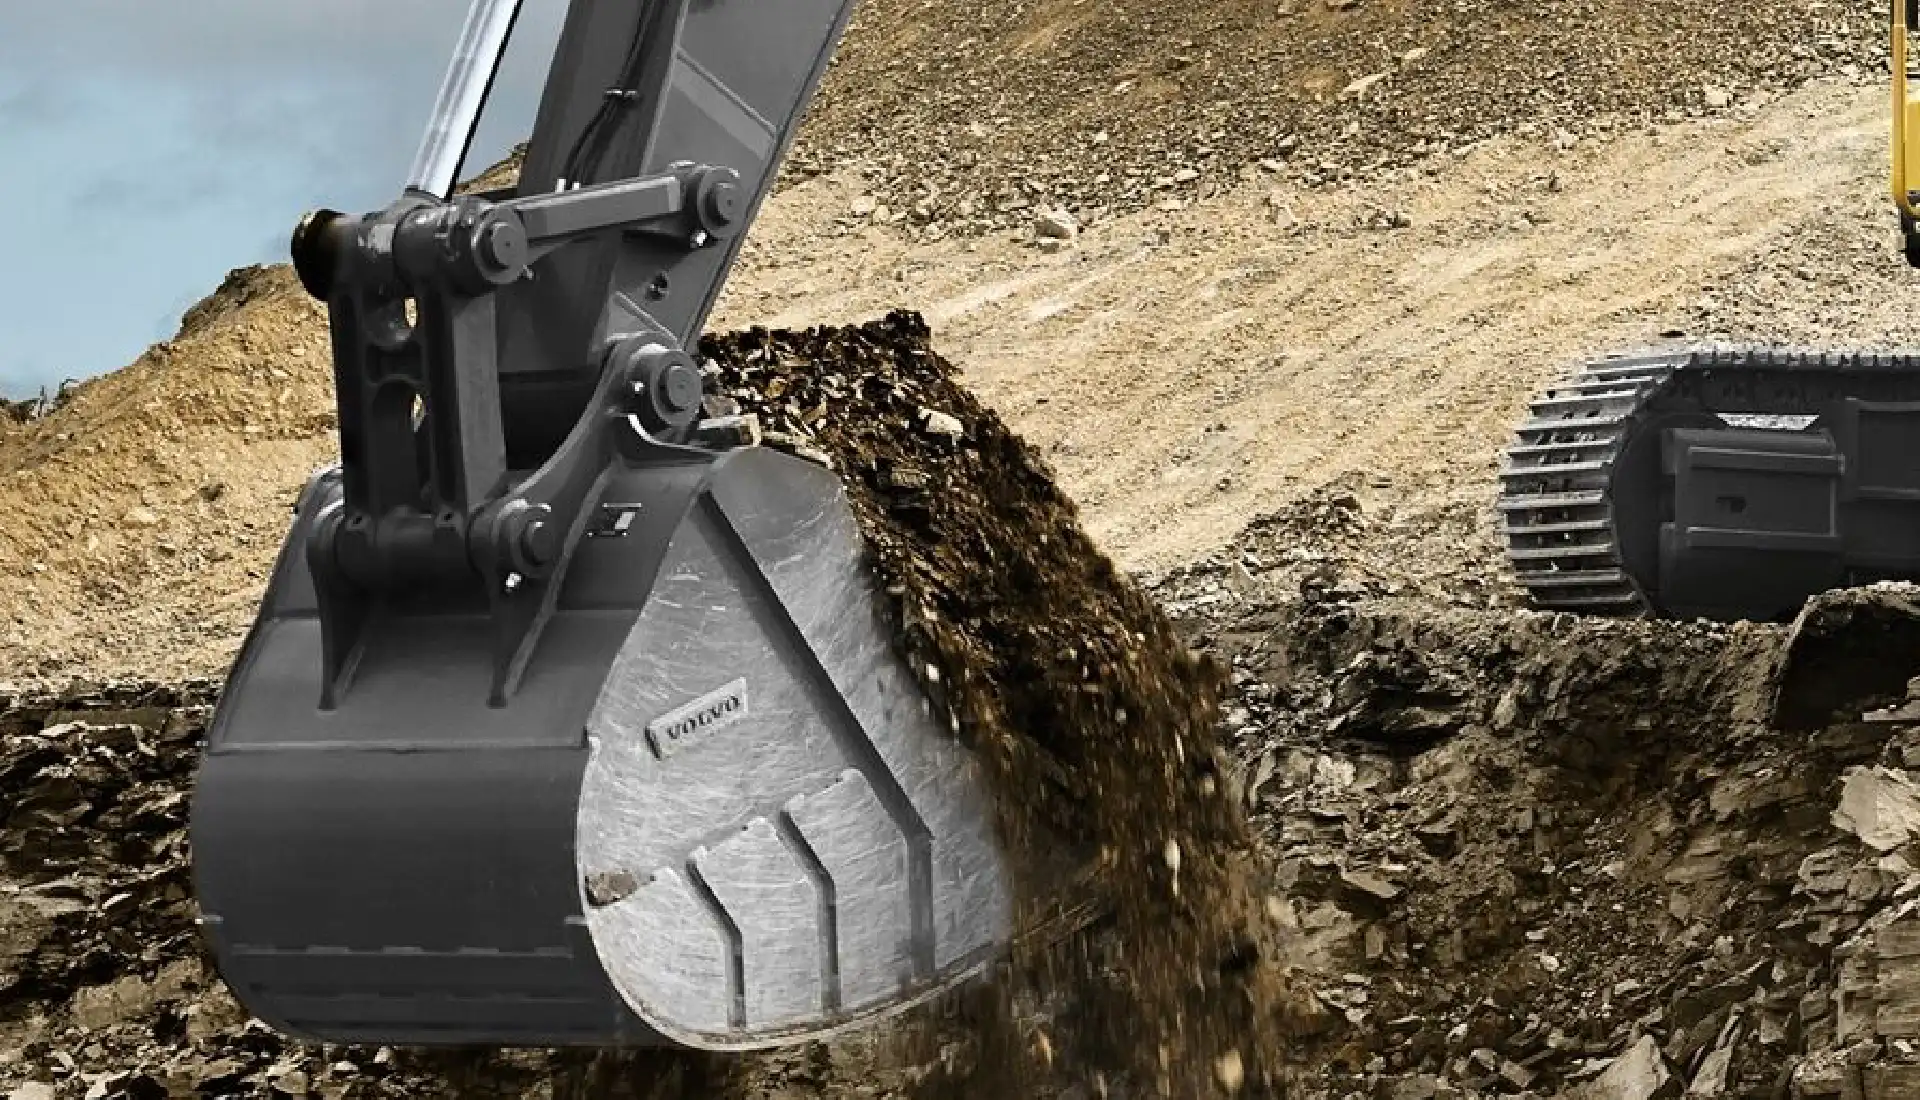
linkStyle 13,14 stroke:#20c997,stroke-width:1.5pxDigging Bucket: This is the most common type, used for general excavation and material handling in construction, landscaping, and other applications. It's the Swiss Army knife of buckets - not specialized, but gets most jobs done.
Rock Bucket: This heavy-duty bucket is designed for excavating in rocky terrain and breaking up hard materials like asphalt and concrete. Notice those extra reinforcements and aggressive teeth? They're not just for show.
Utility Bucket: This bucket is ideal for excavating near underground utilities, as its rounded edge helps prevent damage to cables and pipes. When the cost of a mistake could run into six figures, this specialized bucket suddenly seems like a bargain.
Grading Bucket: This bucket is used for leveling and smoothing surfaces, typically in road construction and landscaping projects. Watch a skilled operator with a good grading bucket leave behind a surface so smooth you could play billiards on it.
Tilt Ditch Cleaning Bucket: This bucket can tilt at an angle, making it suitable for cleaning ditches, working on slopes, and finishing tasks. Once you've used one for drainage work, going back to a standard bucket feels like trying to vacuum your house with a dustpan.
V Bucket: This bucket is used for digging narrow trenches, often for laying pipes or cables. The narrow profile means less backfill material and a cleaner installation - work smarter, not harder.
Skeleton Bucket: This bucket has a grid-like design that allows finer materials to pass through while retaining larger debris, making it useful for demolition and recycling. It's like a built-in sorting system - saves a ton of time on material processing.
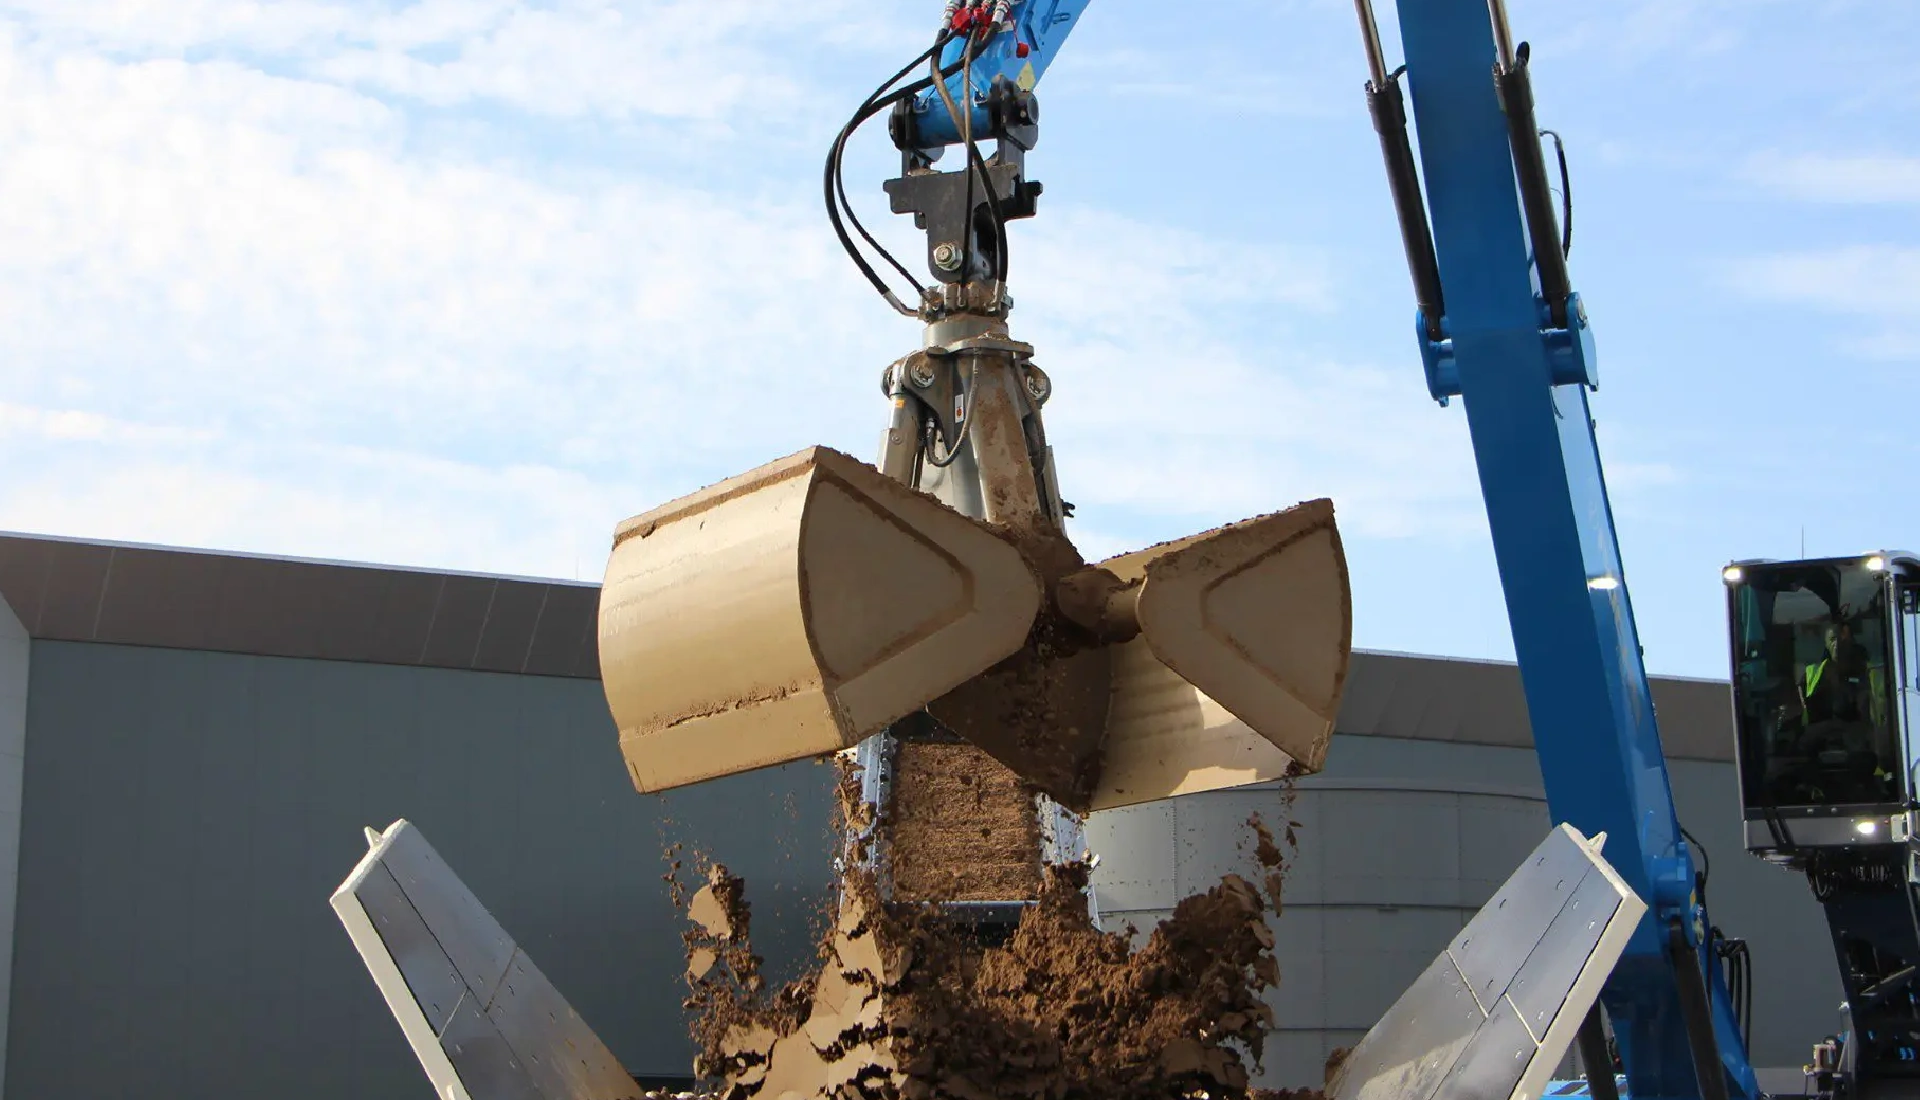
Clamshell Bucket: This bucket is used for vertical digging and material handling, often in dredging and trenching operations. Perfect for those tight spots where a standard setup just won't cut it.
The choice of bucket depends on the specific needs of the project. Using the wrong bucket type is like showing up to a gun fight with a knife - you might get the job done eventually, but it won't be pretty.
To help you choose the right bucket size for your excavator, refer to the following table:
| Excavator Weight (tons) | Standard Bucket Width (inches) | Grading Bucket Width (inches) |
|---|---|---|
| >0.75 | 6-24 | 30 |
| 1-1.9 | 6-24 | 36-39 |
| 2-3.5 | 9-30 | 48 |
| 5-6 | 12-36 | 60 |
| 7-8 | 12-36 | 60-72 |
| 10-15 | 18-48 | 72 |
| 19-25 | 18-60 | 84 |
Cost and Lifespan of Excavator Buckets
The cost of an excavator bucket varies depending on several factors, including size, material, brand, and features. When someone asks "How much does an excavator bucket cost?" without any context, it's like asking "How much is a car?" - the answer is "it depends."
Cost vs. Lifespan: Excavator Bucket Comparison
Key Insights
- Initial Investment vs. Longevity: Higher initial costs typically result in longer lifespans in harsh conditions.
- Material Impact: AR400 steel buckets cost 40-60% more but can last 2-3x longer than standard steel.
- Specialized Buckets: Tilting and skeleton buckets have higher upfront costs but provide specialized functionality.
- Maintenance Effect: Regular maintenance can extend any bucket's lifespan by up to 40%.
| Bucket Type | Avg. Cost Range ($) |
|---|---|
| Standard Digging | 1,000 - 5,000 |
| Heavy-Duty Rock | 7,000 - 15,000 |
| Grading | 2,000 - 6,000 |
| Tilting Ditch Cleaning | 4,500 - 7,000 |
| Skeleton | 3,500 - 8,000 |
| Material Type | Relative Lifespan | Cost Multiplier |
|---|---|---|
| Standard Steel | 1.0x | 1.0x |
| AR360 Steel | 1.8x | 1.4x |
| AR400 Steel | 2.5x | 1.6x |
| HARDOX | 3.0x | 1.8x |
Data represents industry averages. Actual costs and lifespans vary based on manufacturer, application intensity, and maintenance practices.
A typical digging bucket can cost anywhere from $1,000 to $5,000, while larger, more specialized buckets can cost upwards of $20,000. For example, a heavy-duty rock digging bucket for a 45-48 ton excavator can cost between $7,000 and $15,000, while a tilting ditch cleaning bucket for a 12-15 ton excavator can cost between $450 and $7,000.
That price gap? It's all about application specificity and material quality.
The lifespan of an excavator bucket depends on factors like usage, maintenance, and the materials it is used to excavate. High-quality excavator buckets are built for heavy use and should have extra material built into them (wear straps and wear pads) along the bottom and sides.
With proper care and maintenance, an excavator bucket can last for several thousand hours of operation. While the excavator itself has an average lifespan of around 10,000 hours, the bucket's lifespan can vary significantly depending on its type and usage.
Ever noticed how some operators seem to go through buckets like tissue paper while others use the same bucket for years? The difference usually isn't luck - it's a combination of buying the right bucket for the application, proper maintenance, and operating technique.
Maintenance and Repair of Excavator Buckets
Regular maintenance is crucial to ensure the longevity and optimal performance of excavator buckets. Using a bucket with worn or missing teeth is like trying to dig with a spoon - it can be done, but why make life difficult? Key maintenance practices include:
Regular Inspections: Inspect the bucket for signs of wear, cracks, or damage. Pay close attention to the mounting hinges, front leading edges, and bucket corners. Look for cracks, thinning metal, and any signs of stress. The 10 minutes you spend inspecting could save you 10 hours of downtime later.
Cleaning: Remove dirt, debris, and corrosive materials to prevent buildup and damage. You'd be surprised how many buckets fail prematurely simply because they're never cleaned properly after use.
Lubrication: Lubricate pivot points and moving parts to reduce friction and wear. Ensure proper greasing of bucket pin locations. That grease gun might be the cheapest insurance policy you can buy for your attachment.
Sharpening and Replacing Edges: Maintain the sharpness of cutting edges and replace worn or damaged edges promptly. Regularly rotate teeth to ensure even wear. Working with dull teeth isn't just inefficient - it puts unnecessary strain on the entire machine.
Proper Operation: Avoid using the bucket for unintended purposes, such as "walking" the machine, which can cause excessive wear. Use the correct amount of pressure and appropriate speed for the job to minimize wear and tear. We've all seen operators using buckets as hammers or pry bars - when it's your equipment, these practices suddenly seem a lot less clever.
Following these maintenance practices can significantly extend the lifespan of the bucket and reduce repair costs. The difference between a well-maintained bucket and a neglected one is often measured in thousands of dollars and days of productivity.
Conclusion
Excavator buckets are essential attachments that contribute significantly to the versatility and efficiency of excavators. Understanding the different parts, functions, materials, and types of excavator buckets is crucial for selecting the right bucket for the job and ensuring its optimal performance.
Regular maintenance and proper operation are essential for maximizing the lifespan of the bucket and minimizing downtime. By choosing the right bucket and implementing proper maintenance practices, operators can enhance productivity and ensure the safe and efficient completion of excavation projects.
The difference between a successful operation and a struggling one often comes down to these seemingly small details. The right bucket, properly maintained and operated, can be the difference between making money and losing it on a job. Take the time to understand your options, and you'll see the benefits in both productivity and your bottom line.
FAQ
What are the components of a bucket wheel excavator?
A bucket wheel excavator consists of a large rotating wheel with buckets, a boom for positioning the wheel, a discharge conveyor, a superstructure housing machinery, and a crawler track for mobility. These components work together to continuously dig and transport materials in mining operations.
What are the parts of an excavator?
The main parts of an excavator include the boom, dipper (or stick), bucket, cab, hydraulic cylinders, undercarriage, and counterweight. These components enable digging, lifting, and material handling through coordinated hydraulic movements.
What is the bucket of an excavator called?
The bucket of an excavator is commonly referred to as the "digging bucket" or simply "bucket." It is the attachment used for scooping, lifting, and moving materials during excavation tasks.
What is a dipper on an excavator?
A dipper (also called the "stick" or "arm") is the intermediate section between the boom and bucket on an excavator. It extends and retracts to position the bucket for precise digging or lifting operations.