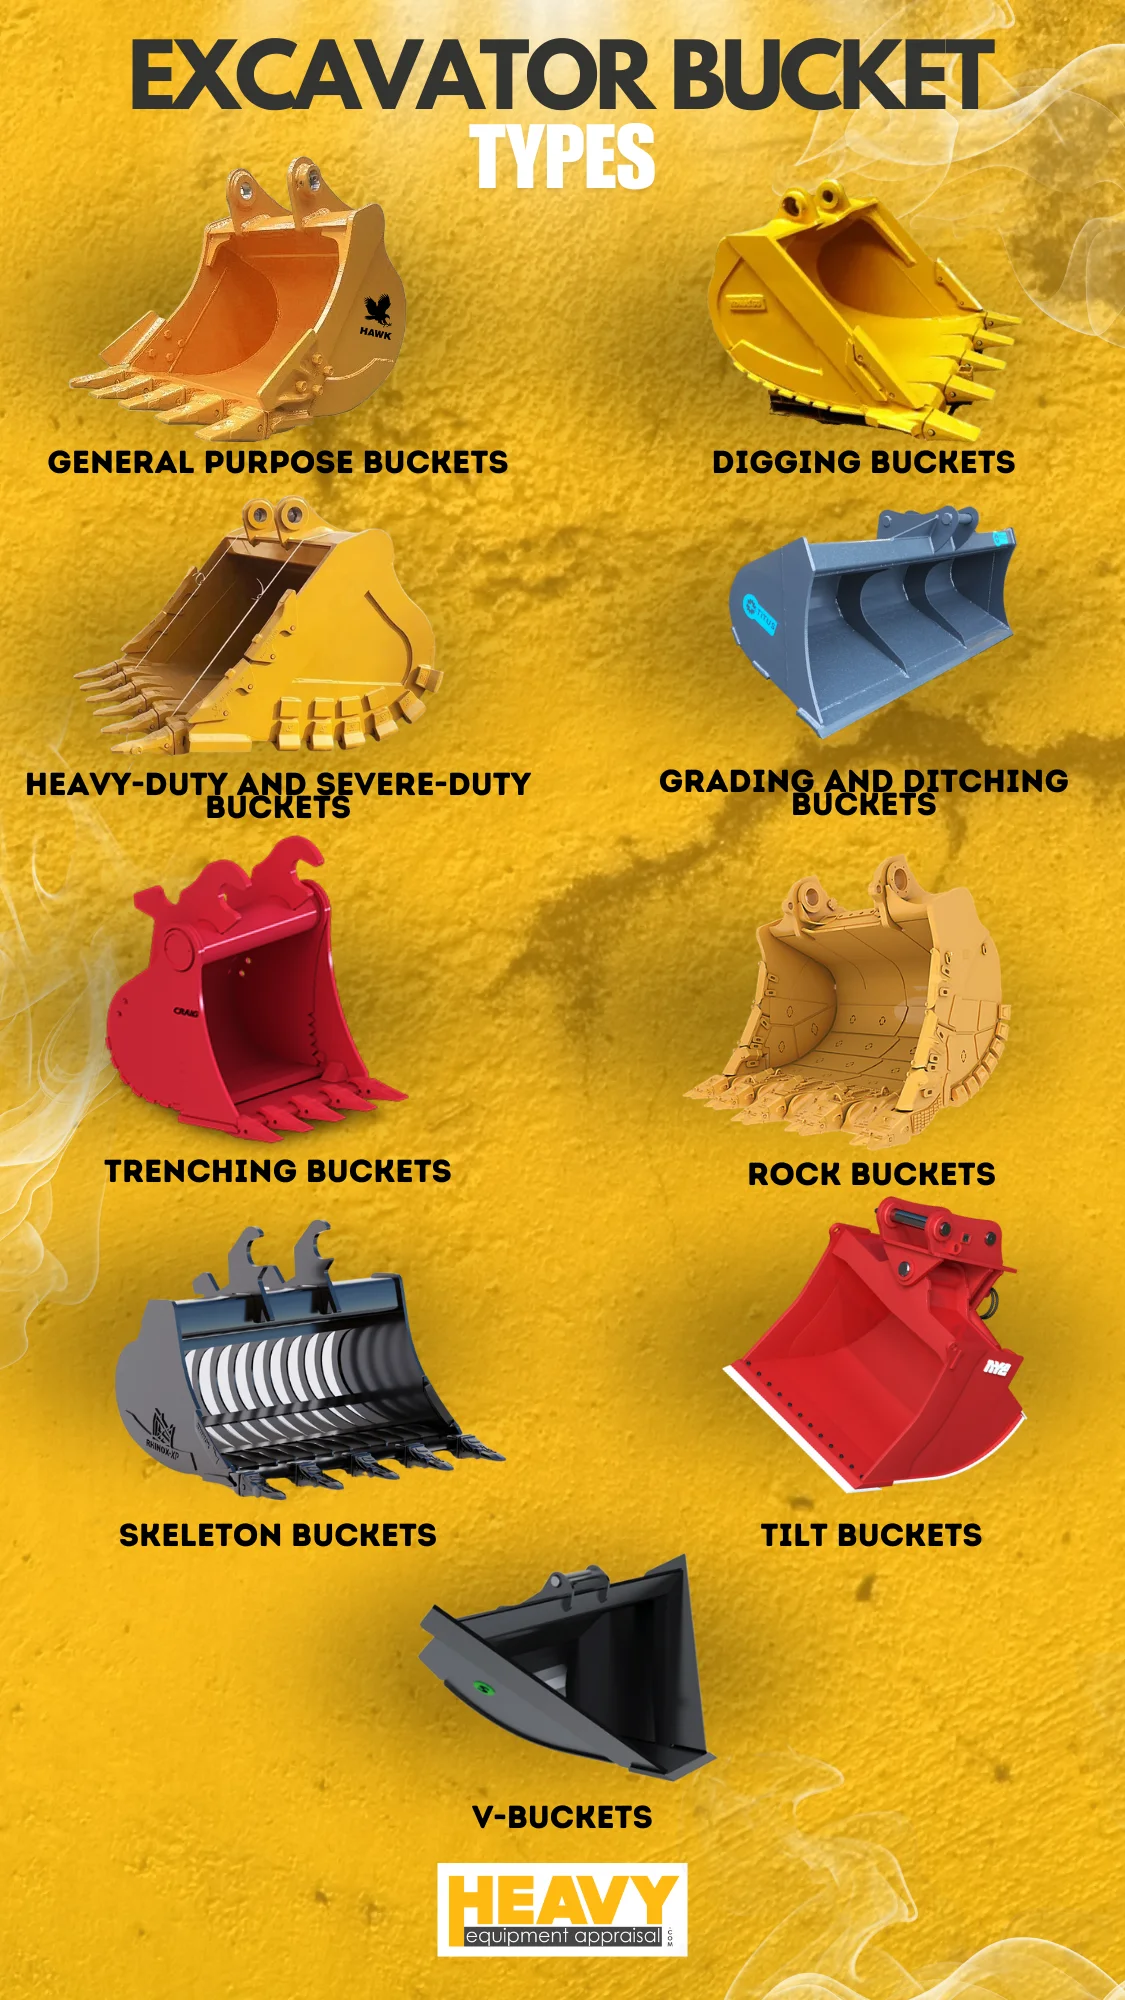
8 Excavator Bucket Types (With Pictures)
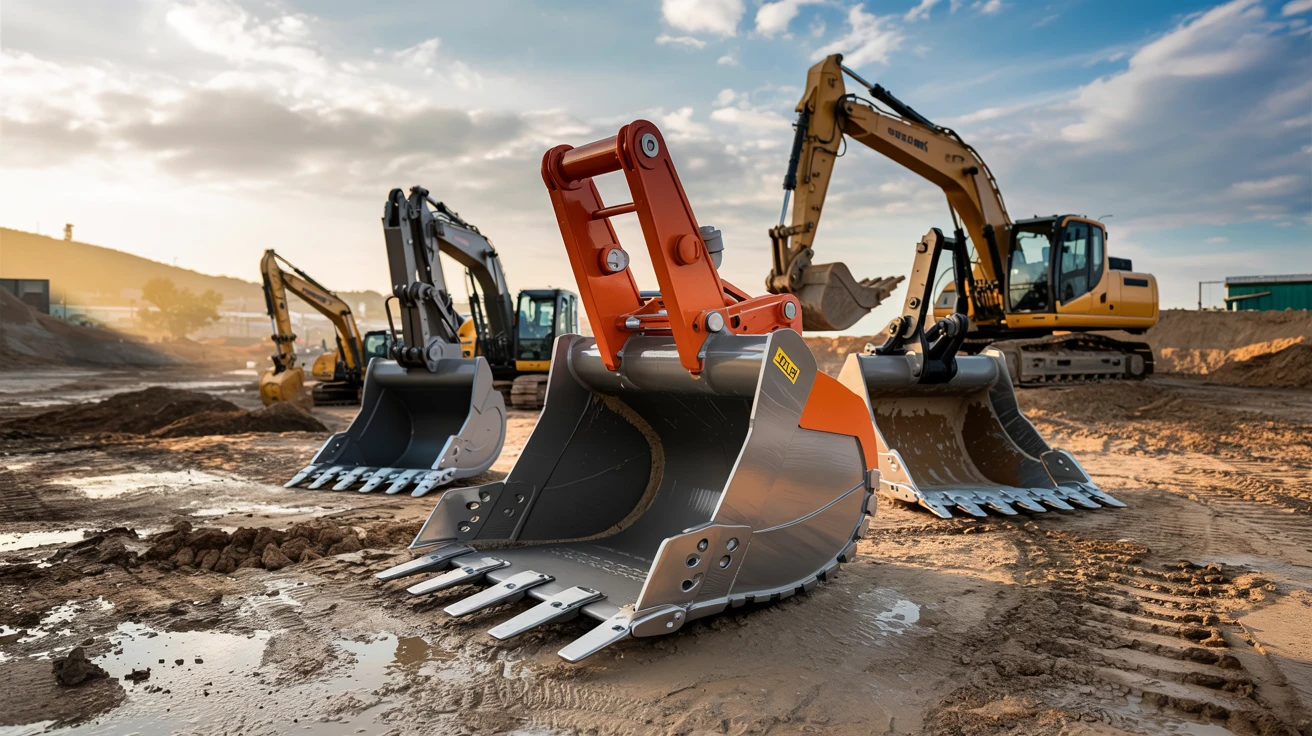
Your excavator’s performance is only as good as the bucket it’s running. From trenching and grading to digging through rock or handling heavy debris, the right excavator bucket type dramatically affects productivity, fuel efficiency, and equipment lifespan. This guide is engineered for construction pros, operators, and project planners who need to align excavator attachments with ground conditions, material density, and jobsite specs.
We break down key excavator bucket types—each designed for specific tasks—to help you choose the best-fit tool that maximizes digging precision and ROI while minimizing wear.
The main types of excavator buckets include general-purpose, trenching, rock, grading, and tilt buckets. General-purpose buckets handle light to moderate digging. Trenching buckets create narrow trenches. Rock buckets manage heavy-duty excavation. Each type supports specific tasks based on material density and digging precision.
What Actually Makes an Excavator Bucket Tick?
An excavator bucket isn’t just a glorified scoop – it’s the business end of your machine where power meets dirt. It’s the direct interface between your expensive piece of equipment and whatever stubborn material you’re trying to move.
The bucket attaches to the end of your excavator’s arm (or stick), and through the bucket cylinder, allows for controlled digging, curling, and dumping actions. While your excavator might come standard with a general-purpose bucket, the real magic happens when you start matching specialized bucket designs to specific tasks.
Think about it – excavators handle everything from fine grading to ripping through rock. One bucket simply can’t be optimal for all these scenarios…and that’s why we have different excavator bucket types:
Types of Excavator Buckets: The Right Tool for the Right Job
graph TD
    A[What material are you working with?] --> B{Hard/Abrasive?}
    B -->|Yes| C[Rocky/Abrasive]
    B -->|No| D{Job Type?}

    C --> E{Extremely Hard/Quarry?}
    E -->|Yes| F[Heavy Duty/Rock Bucket]
    E -->|No| G[GP Bucket with Teeth]

    D -->|Precision Grading| H{On Slopes?}
    D -->|Trenching| I{Width?}
    D -->|Material Separation| J[Skeleton/Sifting Bucket]

    H -->|Yes| K[Tilt Bucket]
    H -->|No| L[Grading/Clean-up Bucket]

    I -->|Narrow/Utilities| M[Trenching Bucket]
    I -->|Drainage with Slope| N[V-Bucket]

    F --> O[Check for ARx00 Steel & Extra Reinforcement]
    K --> P[Verify Hydraulic Capacity]
    M --> Q[Match Width to Application]
1. General Purpose (GP) / Digging Bucket
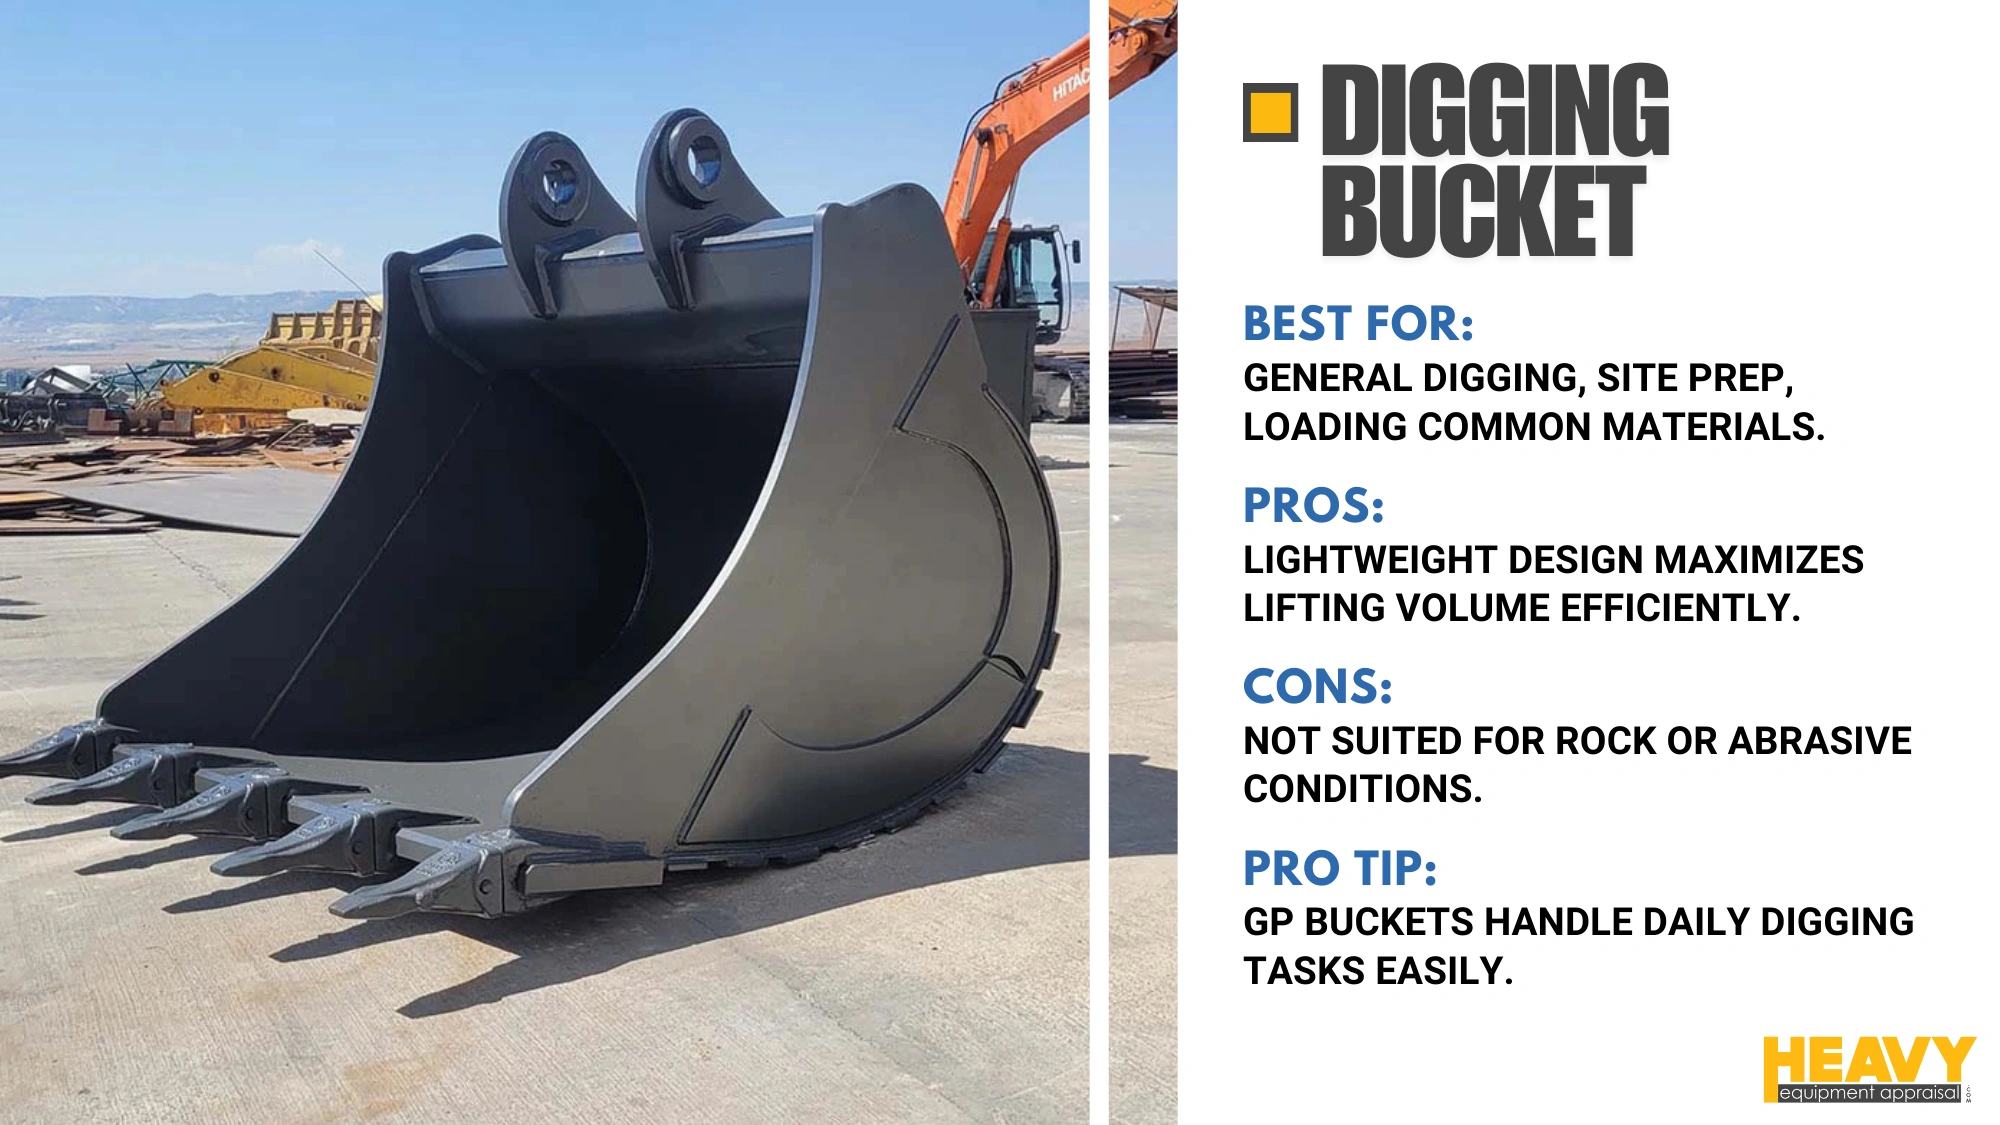
This is your everyday, comes-with-the-machine bucket. It features a versatile shape with short, blunt teeth designed to break through common ground materials.
When to use it: For standard excavation in soil, clay, sand, and loose gravel. It’s your go-to for digging foundations, general site prep, and loading trucks with common materials.
Interesting note: GP buckets are often the lightest type, which can actually be an advantage when you’re lifting less dense materials and want to maximize your volume.
2. Heavy Duty (HD) / Rock Bucket
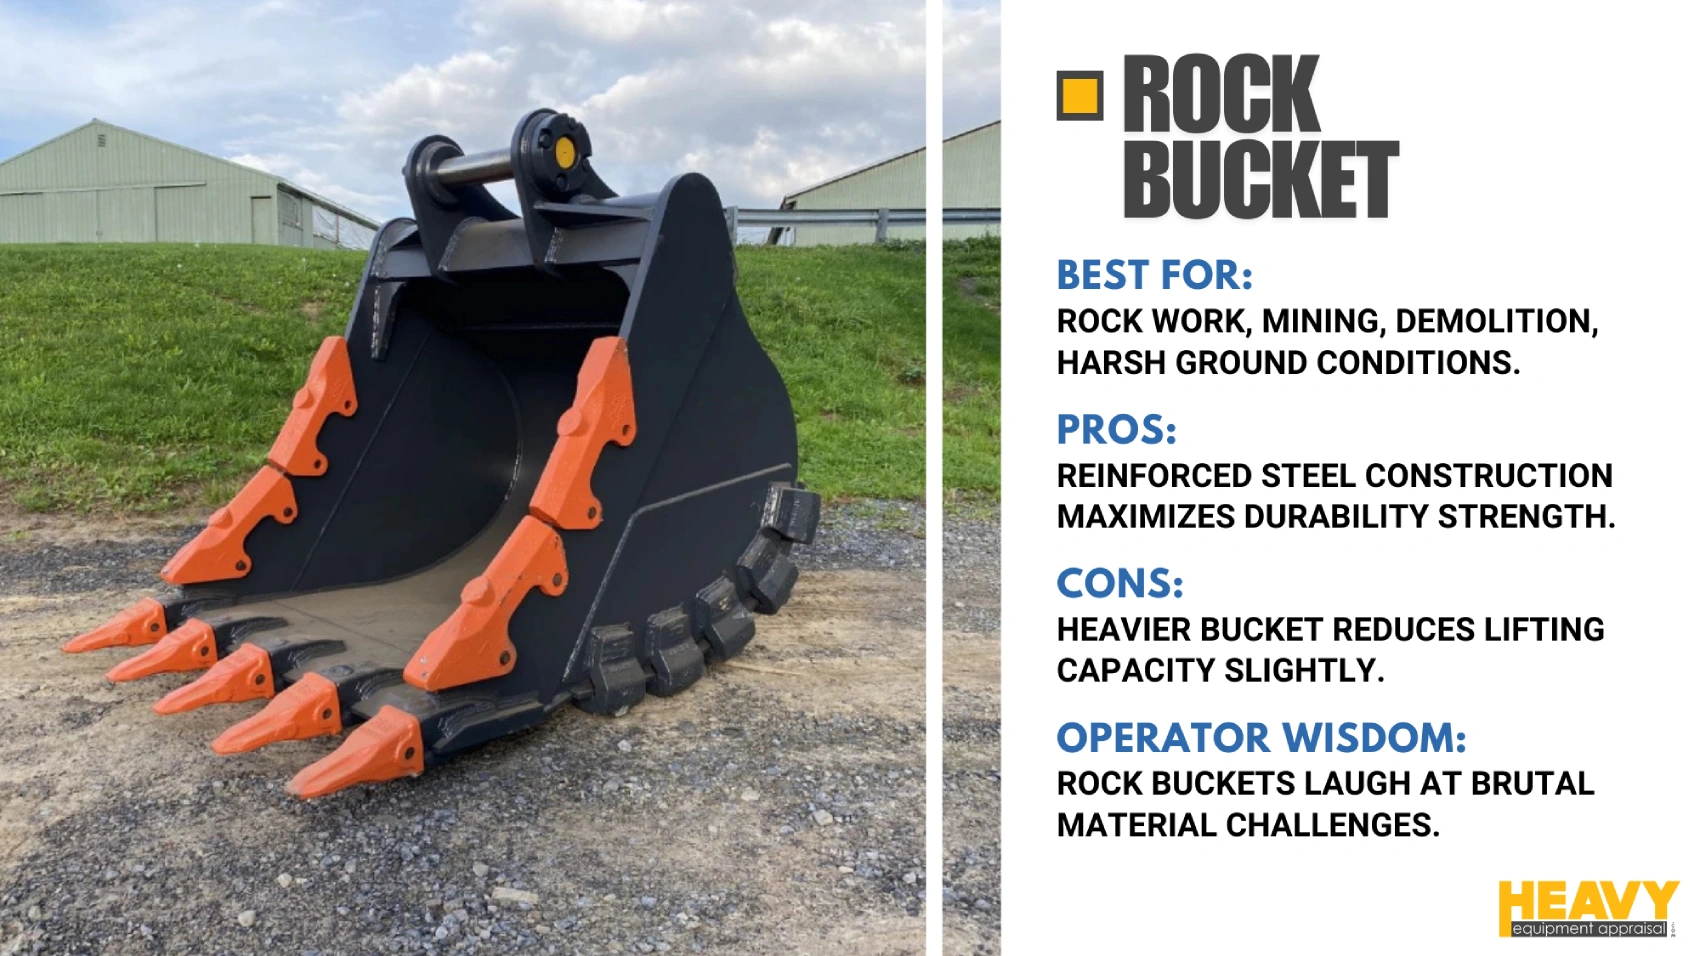
These are the tanks of the bucket world – significantly reinforced with extra, thicker, high-strength, abrasion-resistant steel. They feature robust teeth designed for maximum penetration and breakout force.
When to use it: When you’re dealing with rock, hard-packed clay, or any abrasive material that would tear through a standard bucket like paper. These are essential for quarry work, mining, and demolition involving concrete.
Fun fact: Rock buckets come in progressively beefier categories: Heavy Duty, Severe Duty, and Extreme Duty. The difference? More steel, more reinforcement, and more “I dare you to try and break me” attitude.
3. Grading / Clean-up / Ditching Bucket
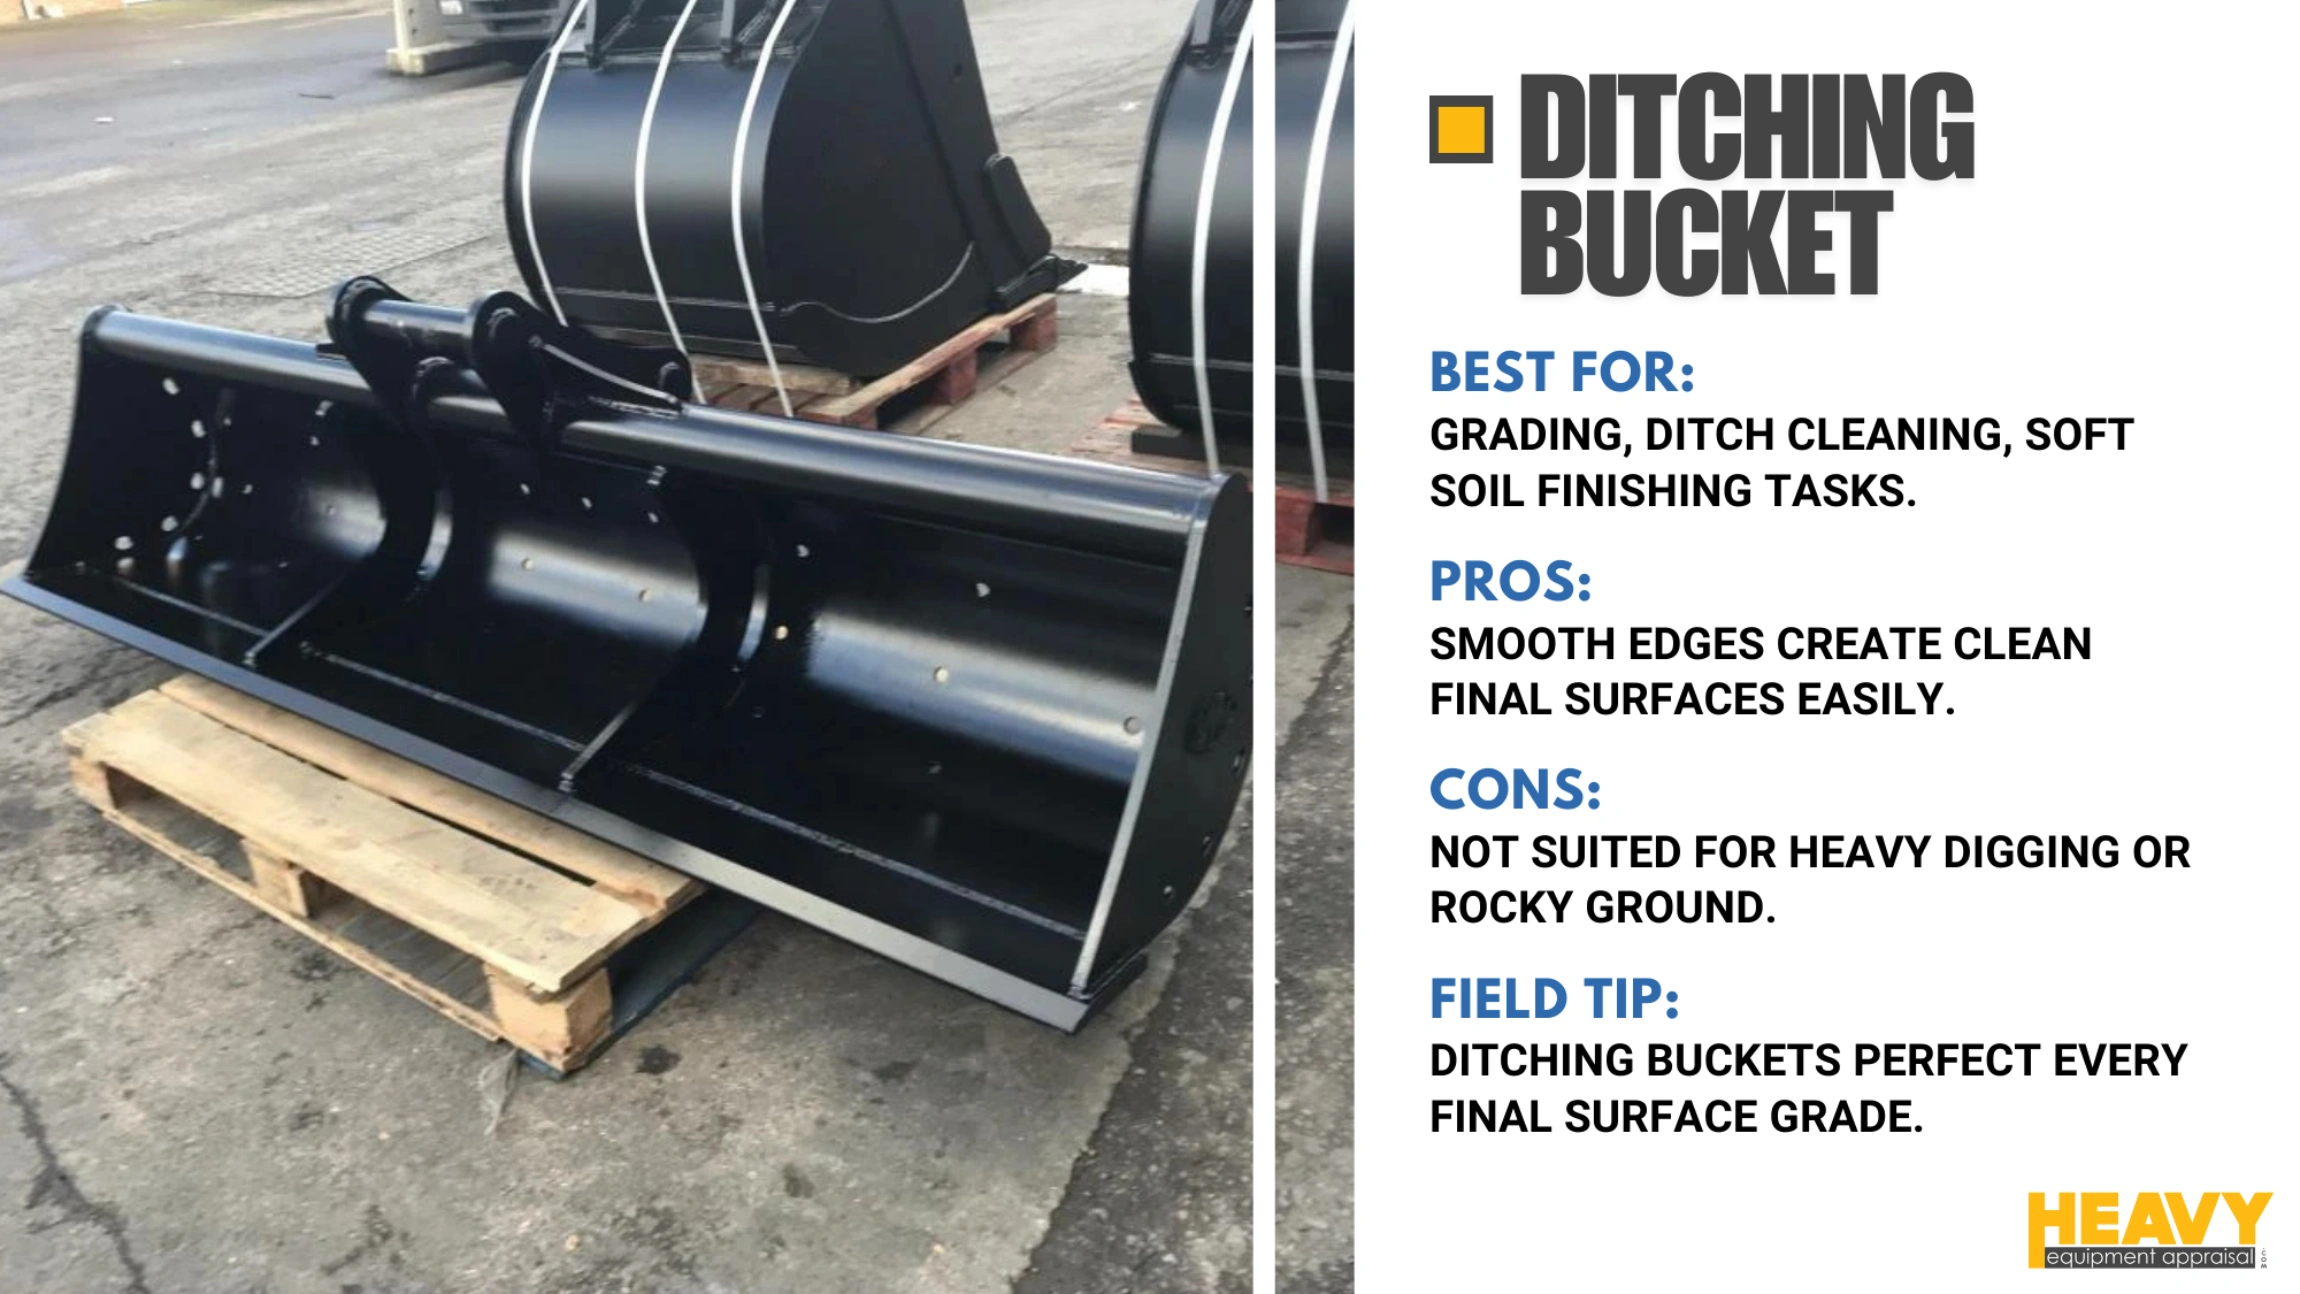
Wide, shallow profile with a smooth, flat cutting edge and no teeth. Think of it as the finishing tool in your excavator arsenal.
When to use it: For creating smooth surfaces, grading slopes, cleaning ditches, backfilling, and handling soft soils or loose materials. Perfect when you need a clean finish rather than brute digging force.
Pro tip: Many include drainage holes for working in wet conditions – a small feature that makes a huge difference when you’re dealing with waterlogged soils.
4. Trenching Bucket
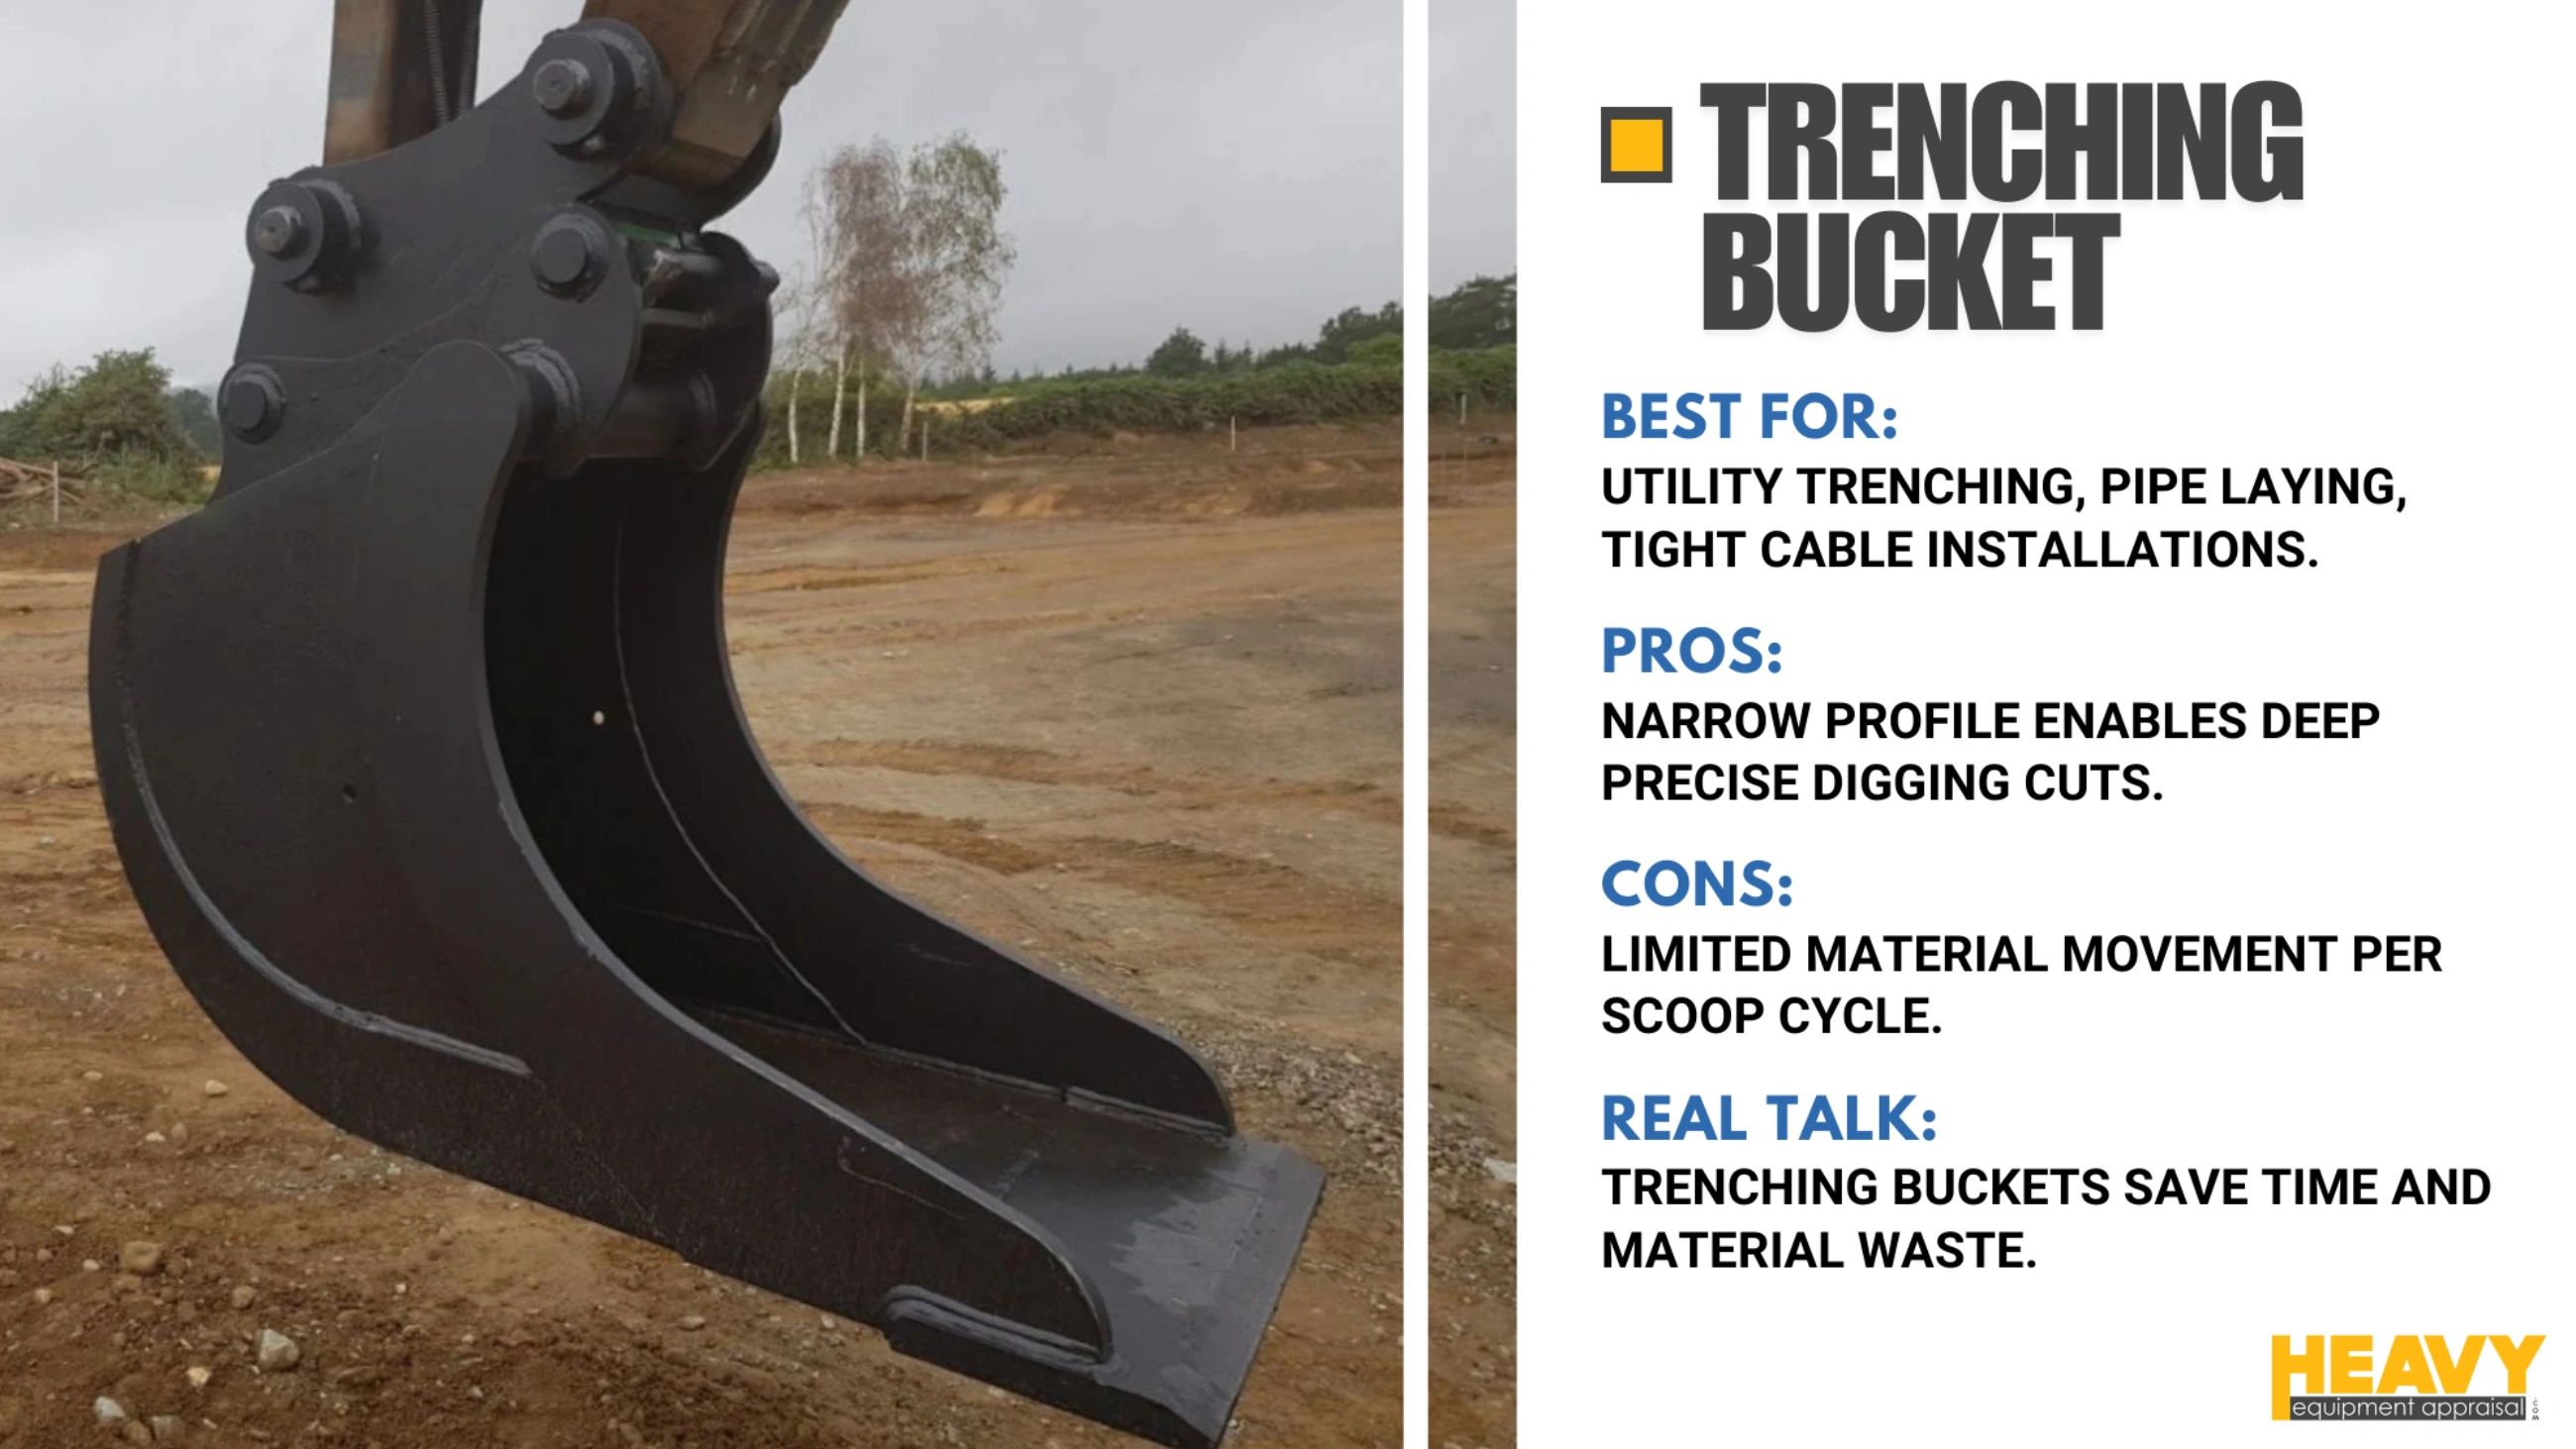
Slim profile (sometimes called “claw-like”) with a long floor, equipped with a sharp cutting edge or teeth.
When to use it: When you need narrow, deep trenches for utilities, pipes, cables, or irrigation systems. Their narrowness allows for precision work in confined spaces, like working between existing lines.
Real talk: Nothing is more frustrating than digging a trench too wide with a GP bucket, then having to fill in the extra space you just created. Trenching buckets eliminate this waste.
5. Skeleton / Sifting / Riddle / Screening Bucket
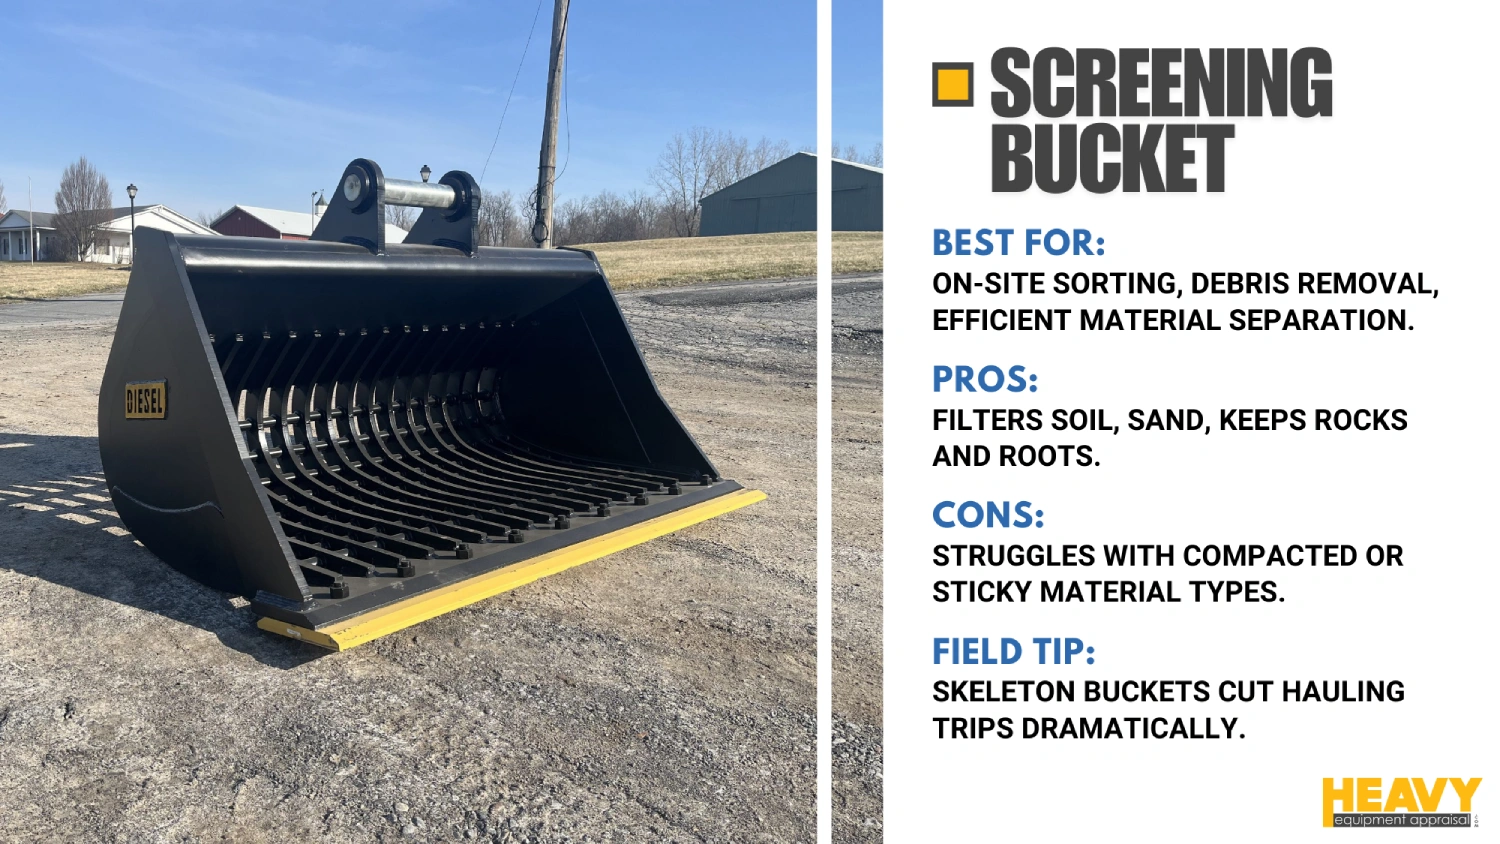
These feature an open structure with gaps, slots, or heavy steel bars forming the back and/or floor. Think of it as a colander for your excavator.
When to use it: When you need to separate materials on-site – letting soil and sand pass through while retaining rocks, roots, or debris. They’re excellent for construction sites, demolition cleanup, and landscaping.
Bottom line: These buckets can eliminate the need to haul material offsite for processing, then back again – saving time, fuel, and disposal costs.
6. Tilt Bucket
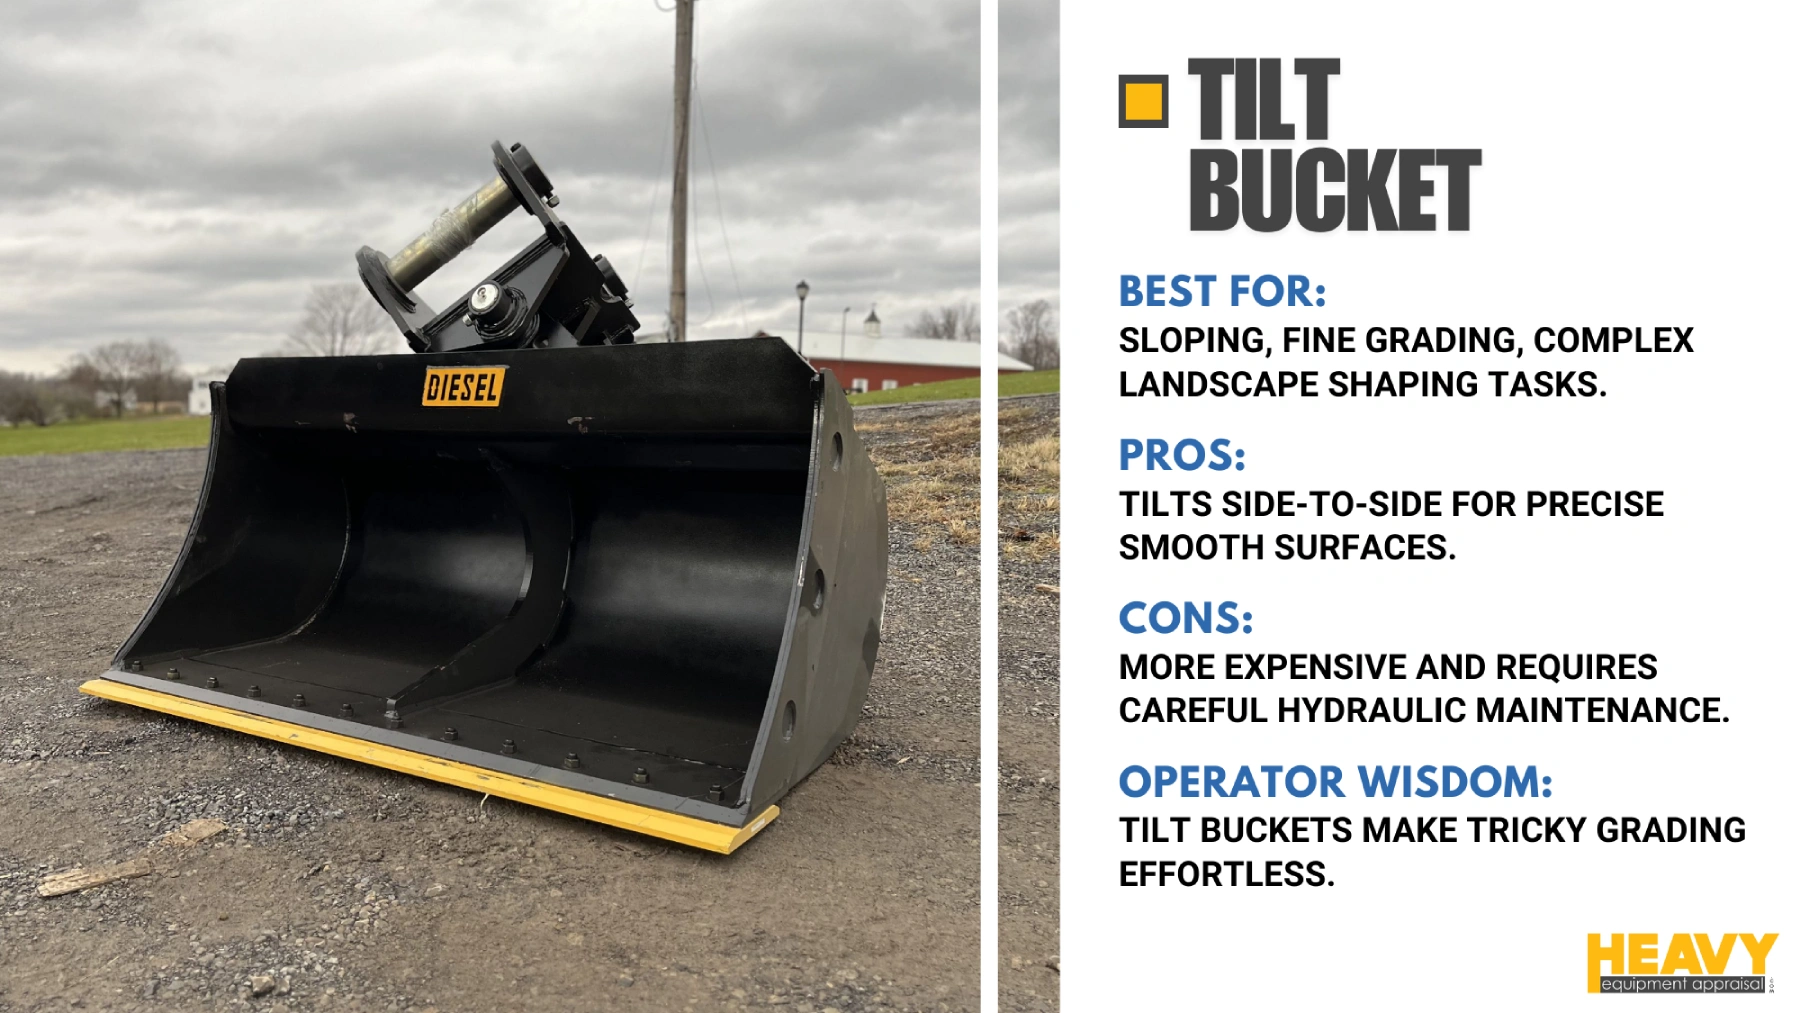
Similar to a grading bucket but with a hydraulic tilting mechanism that allows the bucket to tilt up to 45 degrees left and right.
When to use it: For precise grading, sloping, and finishing work on angled or complex surfaces. Perfect for shaping landscapes, creating road cambers, and working on slopes without constantly repositioning your machine.
Operator’s perspective: Ask anyone who’s tried to grade a complex slope with a standard bucket, then given them a tilt bucket. The difference in time and quality is night and day.
7. Ripper (Attachment)
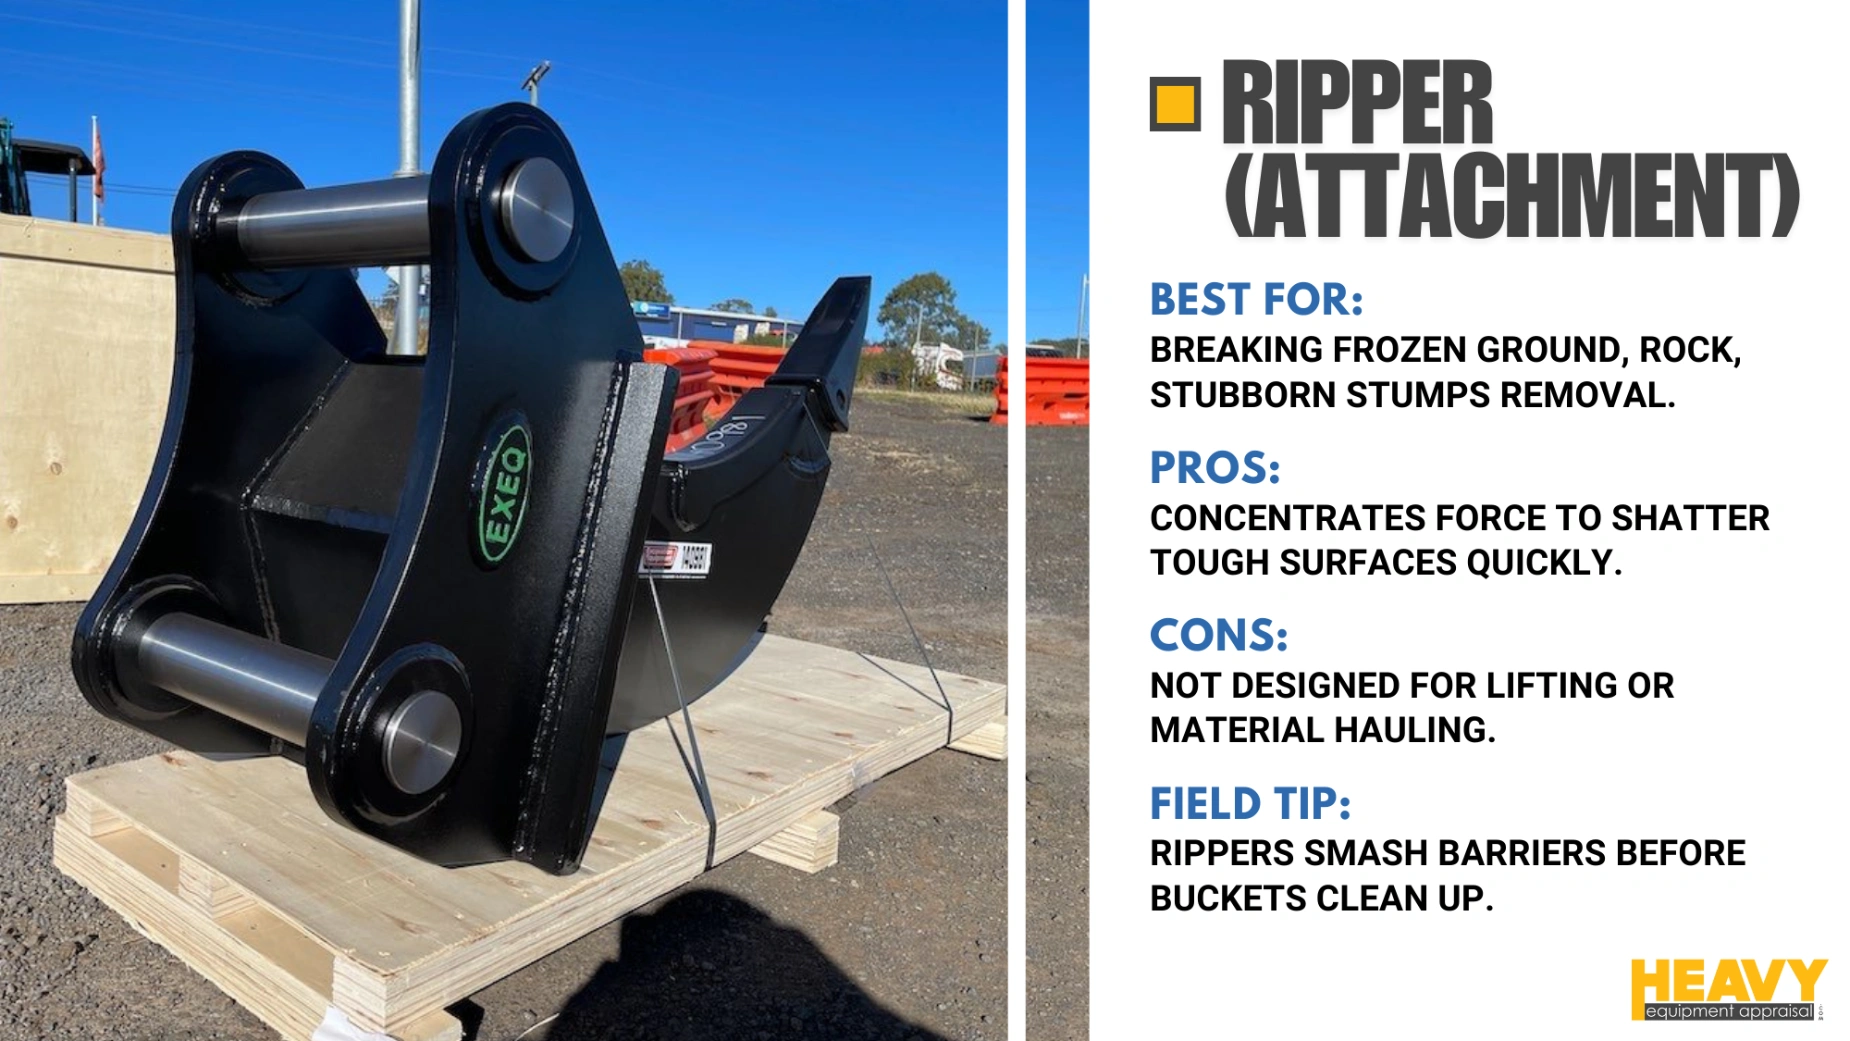
While technically an attachment rather than a bucket, the ripper deserves mention here. It consists of a single, extremely robust, sharp tooth designed to concentrate force.
When to use it: For breaking through very hard, compacted, or frozen ground, rock layers, asphalt, concrete, or removing stubborn stumps and roots.
Smart approach: Use a ripper to loosen difficult material first, then switch to an appropriate bucket for removal. Your machine (and operator) will thank you.
8. V-Bucket (V-Boom / Trapezoid / V-Ditch)

Triangular or trapezoidal shape designed to create V-shaped trenches with clean, sloped sides in a single pass.
When to use it: For digging trenches for drainage or utilities where a specific slope is required. They create a finished trench in one pass rather than requiring reshaping.
What Makes a Great Excavator Bucket? Key Features to Look For
flowchart TD
    A[What Makes a Great Bucket?] --> B[Ground Engagement]
    A --> C[Structure & Protection]
    A --> D[Design & Compatibility]

    B --> B1[Teeth/GET]
    B --> B2[Cutting Edge]
    B --> B3[Side Cutters]

    B1 --> B1a[Standard/Chisel: General soil]
    B1 --> B1b[Rock/Rock Chisel: Abrasive conditions]
    B1 --> B1c[Tiger: Aggressive penetration]
    B1 --> B1d[Spacing: Tight for soil, Wide for rock]

    B2 --> B2a[Straight/Flat]
    B2 --> B2b[V-shaped: Rock penetration]
    B2 --> B2c[Bolt-on: Replaceable]

    C --> C1[Wear Protection]
    C --> C2[Material Thickness]

    C1 --> C1a[Wear Strips/Straps]
    C1 --> C1b[Wear Plates]
    C1 --> C1c[Shrouds]
    C1 --> C1d[Reinforced Edges]
    C1 --> C1e[Gussets]

    C2 --> C2a[Standard: Lighter, less durable]
    C2 --> C2b[Heavy Duty: Medium reinforcement]
    C2 --> C2c[Severe/Extreme: Maximum reinforcement]

    D --> D1[Overall Shape]
    D --> D2[Quick Coupler Compatibility]
    D --> D3[Special Features]

    D1 --> D1a[Wide/Shallow: Grading]
    D1 --> D1b[Narrow/Deep: Trenching]
    D1 --> D1c[V-shape: Specialized trenches]
    D1 --> D1d[Slotted: Material sorting]

    D2 --> D2a[Pin Grabber]
    D2 --> D2b[Wedge Lock]
    D2 --> D2c[S-Type/CW-Type]

    D3 --> D3a[Torque Tube: Structural rigidity]
    D3 --> D3b[Lift Eye: Safe lifting point]
    D3 --> D3c[Drainage Holes: For wet conditions]

    classDef mainNode fill:#f9f,stroke:#333,stroke-width:2px;
    classDef featureNode fill:#bbf,stroke:#33f,stroke-width:1px;
    classDef subFeatureNode fill:#ddf,stroke:#33f,stroke-width:1px;
    classDef leafNode fill:#efe,stroke:#3a3,stroke-width:1px;

    class A mainNode;
    class B,C,D featureNode;
    class B1,B2,B3,C1,C2,D1,D2,D3 subFeatureNode;
    class B1a,B1b,B1c,B1d,B2a,B2b,B2c,C1a,C1b,C1c,C1d,C1e,C2a,C2b,C2c,D1a,D1b,D1c,D1d,D2a,D2b,D2c,D3a,D3b,D3c leafNode;
Teeth (Ground Engaging Tools – GET)
The primary point of contact, teeth concentrate your excavator’s breakout force and protect the leading edge from excessive wear. Different tooth types serve different purposes:
- Standard/Chisel teeth: Versatile for general soil work
- Rock/Rock Chisel teeth: More robust for rocky or abrasive conditions
- Tiger teeth: Aggressive penetration in compacted soils or clay, but wear faster
- Other specialized types: Flare (for loose material), Heavy Duty, Serrated, and Conical
Keep in mind: Tooth spacing matters too – tighter for soil, wider for rock penetration.
Cutting Edges (Base Edge)
The main horizontal blade at the bucket’s front bottom edge. On toothless buckets, it’s the primary surface for cutting and leveling. On toothed buckets, it supports the teeth/adapters.
Smart feature: Many are designed as bolt-on, reversible components, allowing for easier replacement when worn and extending the bucket’s overall life.
Side Cutters
Plates bolted or welded to the outer sides near the cutting edge that increase the bucket’s cutting width and protect the side plates from wear.
Wear Protection (Reinforcement)
Various forms of protection are used to extend bucket life:
- Wear Strips/Straps: Steel strips welded on high-wear areas
- Wear Plates: Thicker steel plates added to vulnerable areas
- Shrouds: Protective castings fitted over edges or between teeth
- Reinforced Edges/Lips: Using thicker steel on the leading edge
- Gussets: Structural reinforcements at joints
Reality check: Proper reinforcement can double or triple a bucket’s service life in harsh conditions. The extra upfront cost pays for itself quickly.
Overall Shape/Design
The bucket’s geometry significantly influences its capacity, digging characteristics, and suitability for specific tasks. Features like a dual radius floor can improve heel clearance, reducing drag and wear.
Material Thickness
The steel thickness determines durability, weight, and ability to withstand impacts and abrasion. However, increased thickness adds weight, which can impact performance and fuel consumption.
The balancing act: Finding the sweet spot between durability and weight is crucial for optimal performance.
Quick Coupler Compatibility
Buckets attach either directly via pins or through a quick coupler system, allowing operators to rapidly switch between different attachments.
Time saver: Hydraulic quick couplers allow operators to change buckets without leaving the cab, significantly boosting productivity on sites requiring multiple bucket types.
Why the Right Bucket Makes All the Difference
Increased Efficiency & Productivity
Using the right bucket ensures maximum material moved with each cycle, drastically reducing job completion time. Specialized buckets excel in their intended roles: Trenching buckets dig narrow trenches faster than GP buckets; Skeleton buckets separate materials efficiently; Tilt buckets minimize machine repositioning.
Real numbers: The right bucket can reduce project time by 20-30% simply by eliminating inefficient movements and rework.
Reduced Wear & Tear (Machine & Bucket)
Using a bucket appropriate for the material minimizes stress on both the attachment and the excavator itself. Using a standard bucket in heavy rock will quickly destroy the bucket and strain the excavator’s components.
Maintenance perspective: The difference between running a GP bucket in rock versus using a properly reinforced HD bucket could mean the difference between daily tooth replacement and weekly checks.
Better Fuel Economy
When an excavator operates with the correctly sized and typed bucket, it performs with less effort. Easier penetration, optimal load filling, and faster cycle times mean the engine works less, resulting in lower fuel consumption.
Enhanced Precision & Quality of Work
For tasks requiring accuracy, specialized buckets are indispensable. Grading and Tilt buckets allow for precise leveling and finishing work that would be difficult or impossible with a standard digging bucket.
Quality impact: The finish quality from the right bucket can eliminate hours of manual touch-up work.
Improved Safety
Using the correctly sized bucket contributes to the excavator’s stability, reducing tipping risk. Specialized buckets like Utility buckets minimize the risk of striking underground utilities during excavation.
Making the Right Choice: Factors to Consider
Specific Job Requirements
Define the primary task: bulk excavation, precision grading, trenching, rock breaking, or material sorting? Consider scale and precision requirements.
Type of Material Being Handled
- Density: Light materials (topsoil, sand) versus heavy, dense materials (wet clay, blasted rock)
- Abrasiveness: Sharp rock, slag, or high-silica sand requires significant wear protection
- Consistency: Loose, compacted, hard-packed, or frozen material determines tooth requirements
Soil/Ground Conditions
Different soil types require different penetration capabilities. Consider terrain; slopes might necessitate grading or tilt buckets, while confined spaces may require specialized designs.
Excavator Size and Compatibility
- Weight/Size Class: Ensure the bucket matches the excavator’s operating weight
- Lift Capacity: The combined weight of the bucket and maximum load must not exceed rated lift capacity
- Hydraulics: Verify the excavator has necessary hydraulic flow and pressure for features like tilt mechanisms
- Coupler System: Ensure compatibility between bucket mounting and excavator coupler
Common mistake: Operators often go for the largest possible bucket, but bigger isn’t always better. An oversized bucket can overload the machine, exceed lift capacity, slow cycle times, increase fuel consumption, and cause premature wear.
Budget Considerations
Evaluate both initial purchase price and total cost of ownership. Factor in potential savings from increased productivity, reduced fuel consumption, and lower maintenance costs.
Smart approach: Think lifecycle cost rather than purchase price. A bucket that costs 30% more but lasts twice as long and increases productivity by 15% is actually the budget choice in the long run.
Maintenance Factors
Check availability and cost of replacement wear parts. Consider construction quality; higher quality materials may cost more initially but offer longer service life and reduced repair needs.
The Value Perspective: What Appraisers Know About Bucket Selection That Others Don’t
When we appraise excavators, we see the financial aftermath of bucket selection playing out in cold, hard cash. The difference between smart bucket choices and “making do” with whatever came with the machine? About 15-25% of your resale value, gone.
We’ve seen it a thousand times. That excavator with premature boom wear and hydraulic issues? Nine times out of ten, it’s from an operator forcing a general-purpose bucket to handle materials it was never designed for. Like watching someone hammer nails with a wrench – yeah, you can do it, but at what cost?
What dealers won’t tell you (because maybe they don’t know) is that specialized buckets create regional value spikes. That tilt bucket might cost you an extra three grand today, but in certain markets, it’ll return double that at trade-in time. The mining regions particularly love their heavy-duty variants – we’re talking 30% premiums for properly equipped units.
Here’s something else we notice in the appraisal game: machines with documented bucket rotation schedules flat-out command better prices. Why? Because it signals to buyers that you’re not the type to run the same bucket through everything from topsoil to rip rap. It’s proof you understand equipment management matters.
The real kicker? Our market data shows excavators sold with multiple bucket types – even if they cost more upfront – retain roughly 18% more value at 5-year disposal benchmarks. That’s not marketing talk. That’s what we see in thousands of real-world valuations.
Unlike dealers pushing this quarter’s attachment inventory or manufacturers with their one-size-fits-most packages, we’ve got no skin in the game except accurate appraisals. We’re just telling you what the numbers consistently show: the right bucket isn’t just about today’s productivity – it’s about protecting your iron’s value for years to come.
The Bottom Line
Let’s cut to the chase—your bucket choice affects everything downstream. The right bucket doesn’t just move dirt faster; it burns less fuel, keeps your excavator out of the shop, and delivers better results with fewer passes.
Here’s what separates pros from everyone else:
They match buckets to materials, not hopes. Sand, clay, and rock each demand something different, and fighting physics is expensive.
They recognize when specialized buckets pay for themselves. That tilt bucket might cost more upfront, but when you’re finishing complex grades without repositioning your machine every thirty seconds, the math gets pretty clear.
Next time productivity seems off, look at what’s on the end of your stick first. Dollar for dollar, it might be the cheapest performance upgrade you’ll ever make.
FAQ
How many types of excavator buckets are there?
There are several types of excavator buckets, including digging buckets, ditching buckets, rock buckets, trenching buckets, and skeleton buckets. Each type is designed for specific tasks such as general digging, grading, handling rocks, or sorting materials. The exact number can vary by manufacturer, but these are the most common categories.
How many types of buckets are there?
There are multiple types of buckets used in construction and excavation, such as digging buckets, ditching buckets, rock buckets, trenching buckets, and skeleton buckets. Each bucket type serves a unique function based on the material and task at hand. The main types are designed for digging, grading, handling rocks, and separating debris.
What is the difference between a ditching bucket and a digging bucket?
A ditching bucket is wider and has a smooth edge, making it ideal for grading, shaping, and cleaning ditches. A digging bucket is narrower, features teeth, and is designed for breaking and excavating tough soil or materials. Ditching buckets are used for finishing work, while digging buckets are used for heavy-duty excavation.
What is the difference between a rock bucket and a digging bucket?
A rock bucket is reinforced and built with stronger materials and larger teeth to handle rocks and heavy debris. A digging bucket is typically lighter and designed for general-purpose excavation in soil or clay. Rock buckets are used for demanding tasks involving rocks, while digging buckets are suited for standard earthmoving.